Building My Bartop Arcade Cabinet: A Retro Dream Come True
You ever wake up one day, look at your life, and think, “Man, why am I sitting here playing games on a tiny plastic controller like some exhausted teenager when I could be living the full arcade experience like it’s 1993?”?
Yeah. That was me.
Turns out if you’ve got some leftover wood, a Raspberry Pi, and a questionable amount of confidence, you can build your own bartop arcade cabinet. And let me tell you: nothing makes you feel more like a grown man-child in the best possible way.
This whole project is basically nostalgia wrapped in sawdust, swearing, and electronics. It’s woodworking meets retro gaming meets “please don’t let me electrocute myself today.”
Planning and Design
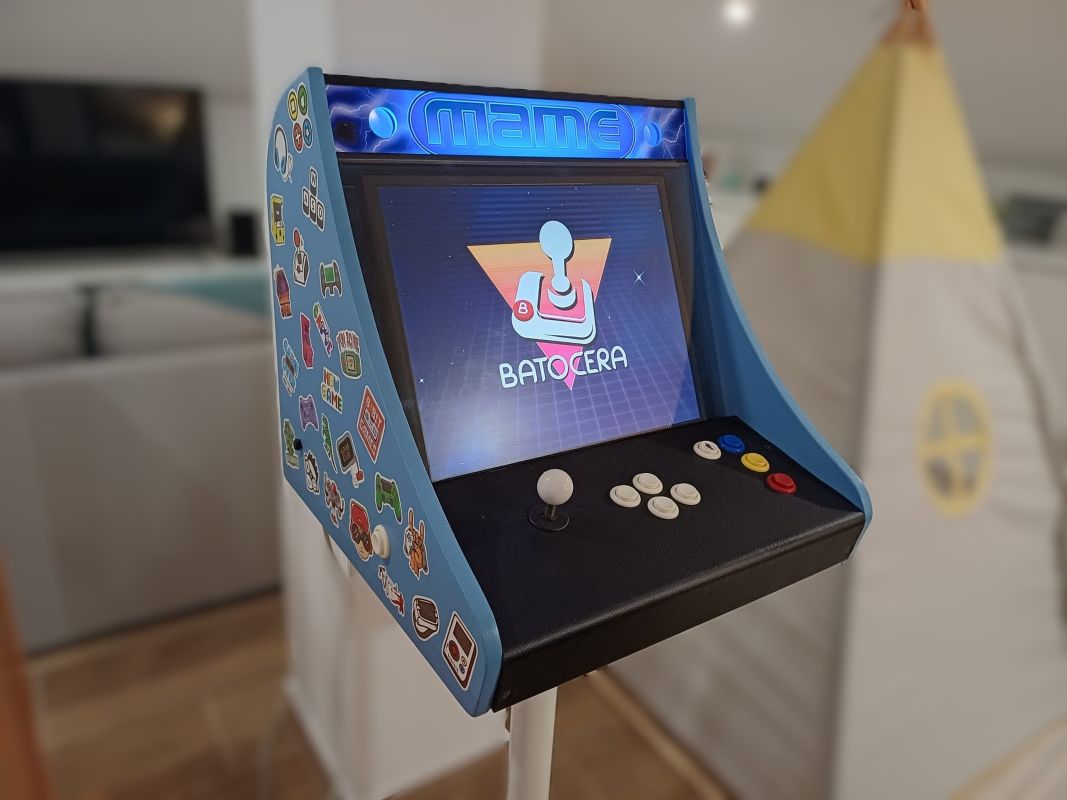
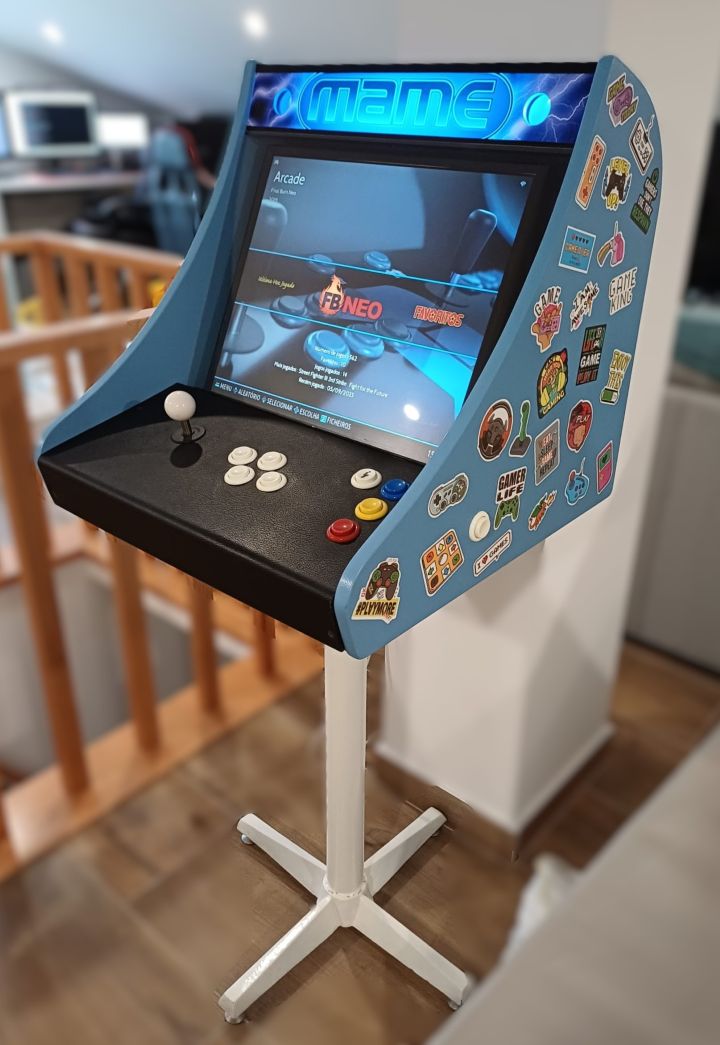
Before I started hacking MDF like a lunatic, I had to actually plan things. A bartop cabinet is like a full-size arcade machine but with the height of a toddler — perfect for small spaces and for pretending you're a responsible adult with “decor.”
I sketched the whole thing out on paper like some kind of architect, then refined it in CAD so I wouldn’t completely embarrass myself.
The goal?
Make it compact without making my wrists cry.
Here’s what actually mattered:
- Screen angle: Around 10–15°. Enough tilt so you’re not staring down like you dropped your keys.
- Control panel height: About 10 cm above the table. Comfortable. Civilized.
- Speaker placement: Front-facing near the marquee so the sound doesn’t fire backwards into the wall like an idiot.
- Accessibility: I added a hinged back panel because I knew I’d be opening this thing 600 times to fix my own mistakes.
Materials and Tools
I grabbed 19mm MDF, because it’s cheap, smooth, and perfect for this kind of build — also weighs as much as a small planet and creates dust that’ll make you rethink all your life choices.
Materials I used:
- 19mm MDF
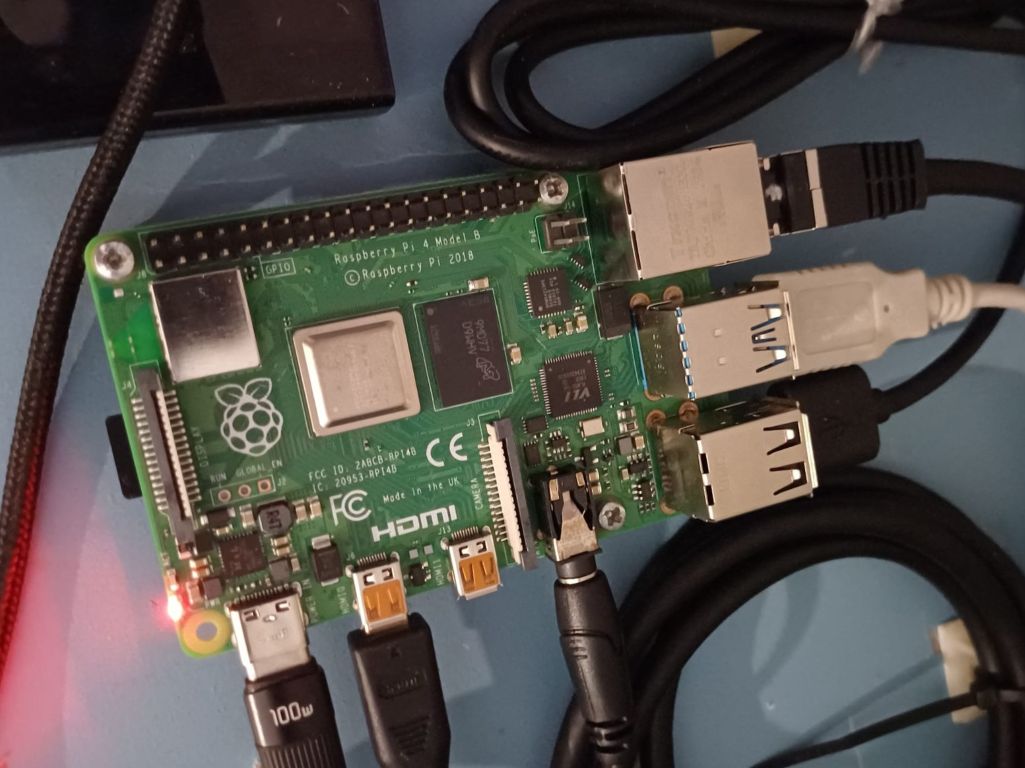
- Raspberry Pi B+ (upgraded to Pi 3 because… obviously)
- A 19” 4:3 LCD I pulled out of a long-dead office computer
- HDMI to DVI adapter
- Arcade buttons + joysticks (thank you, Aliexpress)
- USB encoder salvaged from a Frankenstein gamepad
- Speakers + amplifier board
- Powered USB hub
- LED strip (because everything’s better with LED strips)
- Power strip
Tools:
- Jigsaw and circular saw
- Drill with hole saws
- Screws, glue, tape measure
- Sandpaper (the type that ruins your fingerprints)
- Spray gun or roller
- Clamps — lots of clamps
Building the Cabinet
First thing I did was cut the side panels, which is basically the moment where you decide whether your cabinet will look legit or like a melted shopping cart. I traced my template, cut both sides at the same time (pro move), and then assembled the frame with glue and screws.
Mounting the screen?
Oh man, that was a trip.
I built a small internal frame, slapped a wall-mount bracket in there, stripped the LCD like I was defusing a bomb, and somehow it all fit behind a custom acrylic front. Looked clean. Almost like I knew what I was doing.
Then came the control panel — easily the most satisfying part. I drilled holes for buttons and the joystick, making sure everything was spaced so my hands wouldn’t feel like they were playing Twister.
Electronics and Wiring
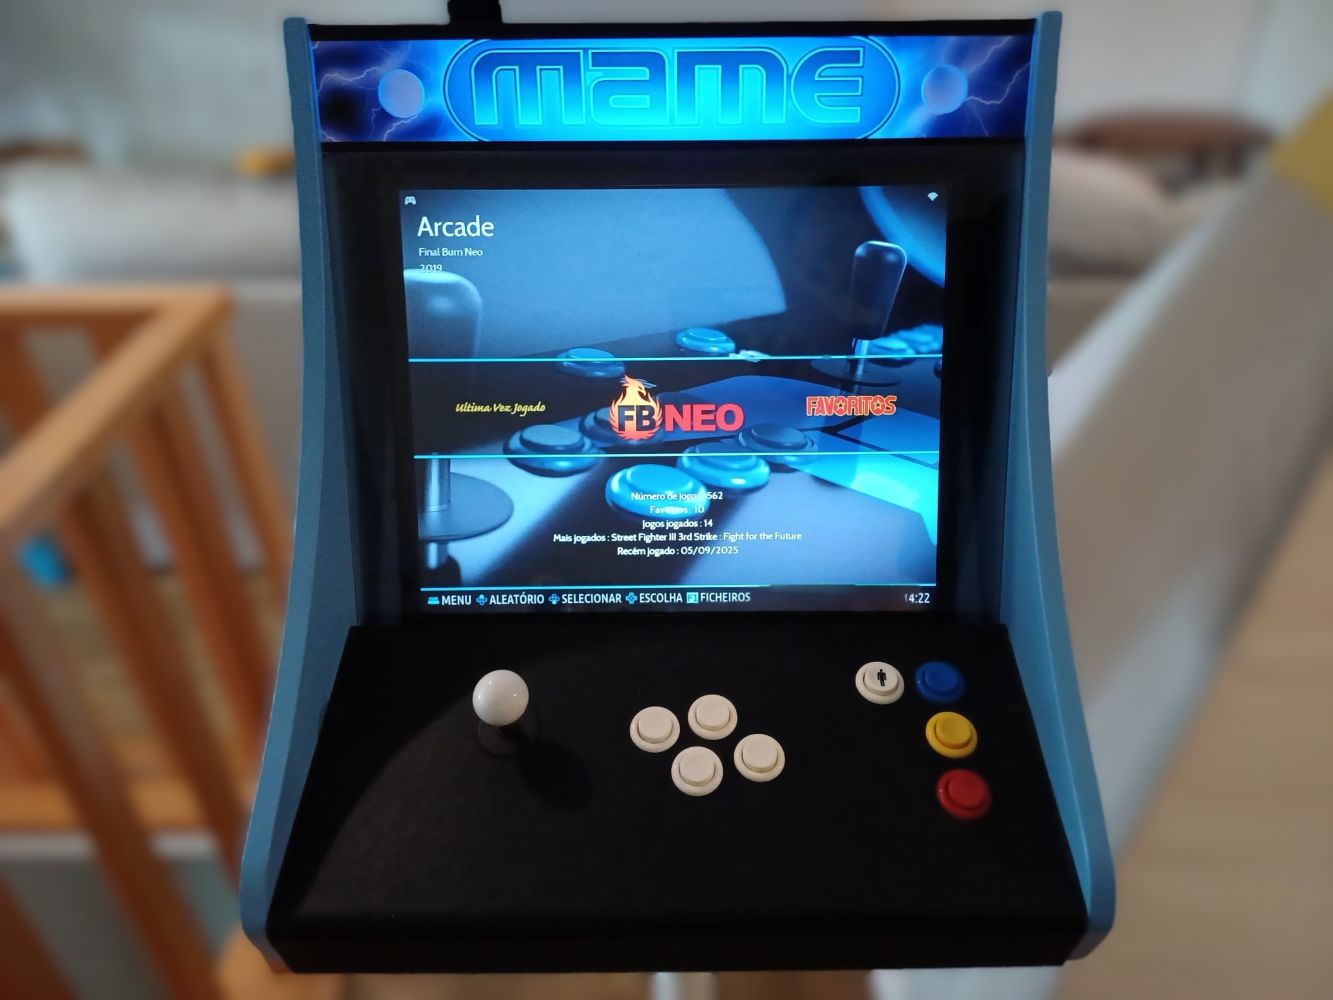
The brain of this tiny arcade beast is a Raspberry Pi 3 running Batocera. Surprisingly powerful for something the size of a cookie.
Here’s what this thing runs:
- Anything 16-bit era? Perfect.
- GBA, 32X? Flawless.
- PS1? Chef’s kiss.
- N64 and PSP? Mostly good. Prepare for a couple tantrums.
- Dreamcast? Shockingly playable.
Wiring everything together:
- Plugged the LCD using HDMI-to-DVI
- Hooked every button to the USB encoder
- Connected encoder → Pi
- Wired speakers to the amp
- Added LED strip because I crave validation
Cable management was handled with zip ties because that’s how adults solve problems.
Painting and Finishing Touches
I primed the whole thing twice, then hit it with three coats of satin light blue because that’s what my wife pointed at. Honestly? She was right. It looks awesome.
Added vinyl decals so it actually resembles a real arcade machine and not a sad blue box. Wrapped the control panel in faux leather because my hands deserve luxury.
Setting Up the Software
Installing Batocera was easy — getting all my emulators, ROMs, themes, and input maps perfect took… let’s just say “a long time.”
Best-performing emulators on this build:
- FBneo — pure arcade goodness
- SNES9x — works like a charm
- PCSX-ReARMed — PS1 heaven
- Genesis Plus GX — Sega perfection
Lessons Learned
Some things I picked up after nearly losing my sanity:
- Measure three times — cut once — swear anyway
- MDF chips if you look at it wrong
- Label your wires unless you enjoy suffering
- Tight tolerances matter more than your feelings
Next time I might:
- Use lighter wood
- Add fans
- Build a two-player setup
- Go for a beefier speaker/amp combo
Conclusion
Building this bartop arcade cabinet was absolute DIY therapy. It’s retro, it’s ridiculous, and it makes me feel like a kid every time I smash those buttons. It’s part furniture, part nostalgia machine, part “hey look I built something awesome.”
Now every time I hear those clicky arcade buttons, I get transported straight back to the golden days — except now I don’t need quarters, I don’t need permission, and nobody’s waiting behind me to steal my turn.
If you want a fun, challenging, swear-filled project that pays off big time, build one. Your inner 10-year-old will thank you.
Comments
No comments yet. Be the first to comment!
Leave a comment