Revolutionize Your Rig: Building a Sim Racing Wheel for the Thrustmaster T300 base
So you buy a Thrustmaster T300 RS thinking, “Yeah, this is it, I’m finally entering the world of force feedback like a responsible adult.” And don’t get me wrong, it’s a great wheel. Solid force feedback, reliable base, plenty of official rims. But after a while you start thinking, “Why does this still feel like I’m steering a rental car at the airport?” That’s when you go down the rabbit hole of custom wheels, oversized rims, and buttons everywhere like you’re piloting a spaceship.
This is the story of how I built my own 35cm sim racing wheel addon, slapped a bunch of working buttons on it using an Arduino, and made the T300 base deal with it.
Why go custom?
Look, Thrustmaster makes some perfectly good wheels… but they also make them like you’re only supposed to use one at a time for the rest of your life. Meanwhile, sim racers want options. Bigger, smaller, round, flat, too many buttons, not enough buttons, it's chaos.
A 35cm wheel changes everything. Feels more like a real car, gives better leverage, and doesn’t make you feel like you’re driving a toy. And when you build it yourself, you get to decide:
- Where the buttons go
- What it looks like
- How big it is
- Whether it feels like a rally car or a bus
And unlike some of those overpriced rims you find online, a DIY solution doesn’t require you to sell a kidney. You put in some elbow grease, learn a few things, and end up with something awesome and affordable. Win-win.
Gathering your components
Before you start drilling holes like a maniac, you’ll need the essentials:
-
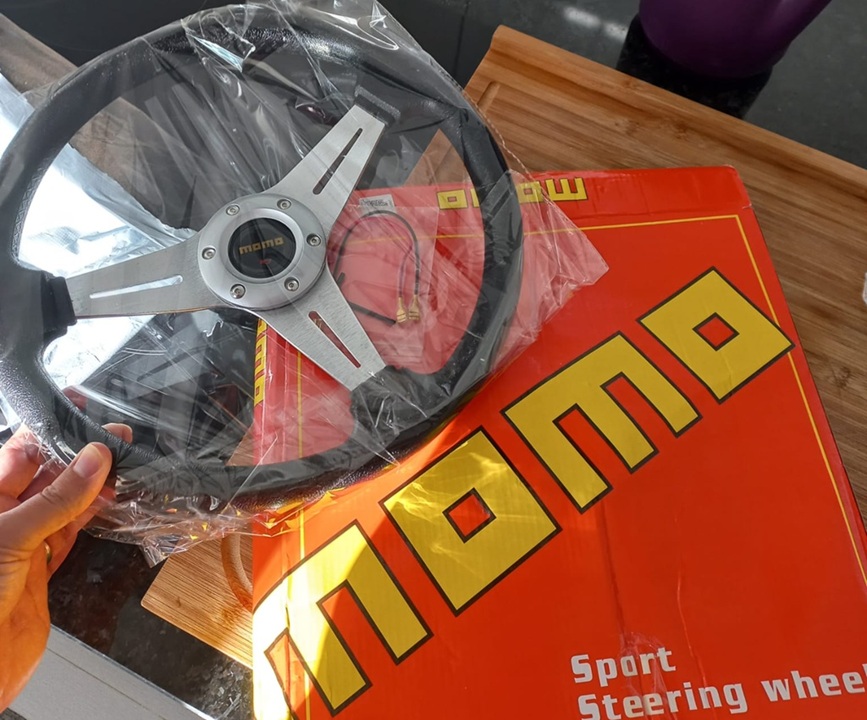
35cm Steering Wheel Rim: Real car wheel or AliExpress special. Just don’t pick one heavy enough to throw the T300 into cardiac arrest.
-
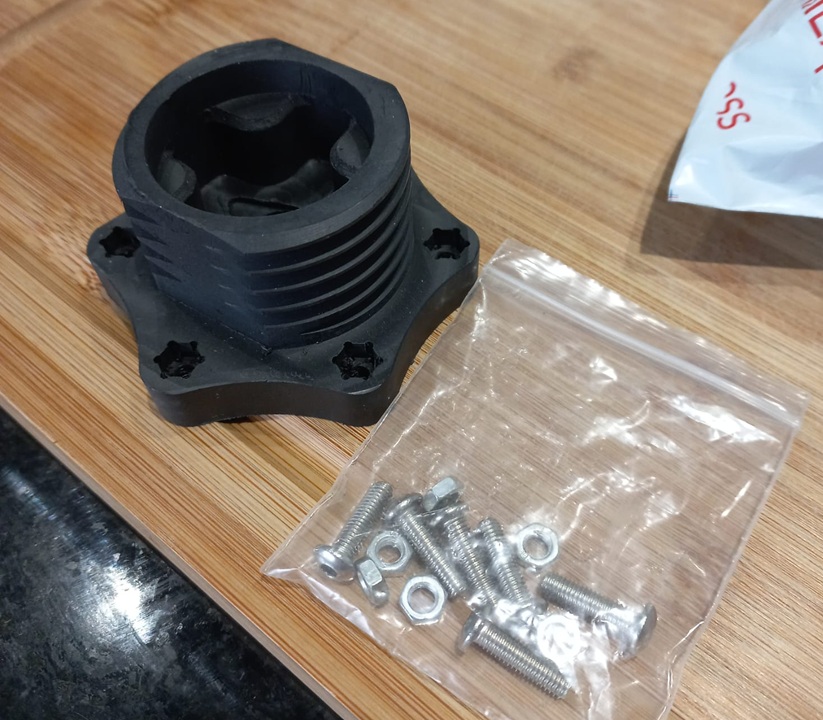
T300 Quick Release Adapter: You can get a 3D-printed one, but personally, I don’t trust my life (or my wheelbase) to a spool of PLA. I used a machined one.
-
Arduino Nano V3.0: Tiny, cheap, does the job.
-
Push Buttons: The fun part. As many as you want, wherever you want them.
-
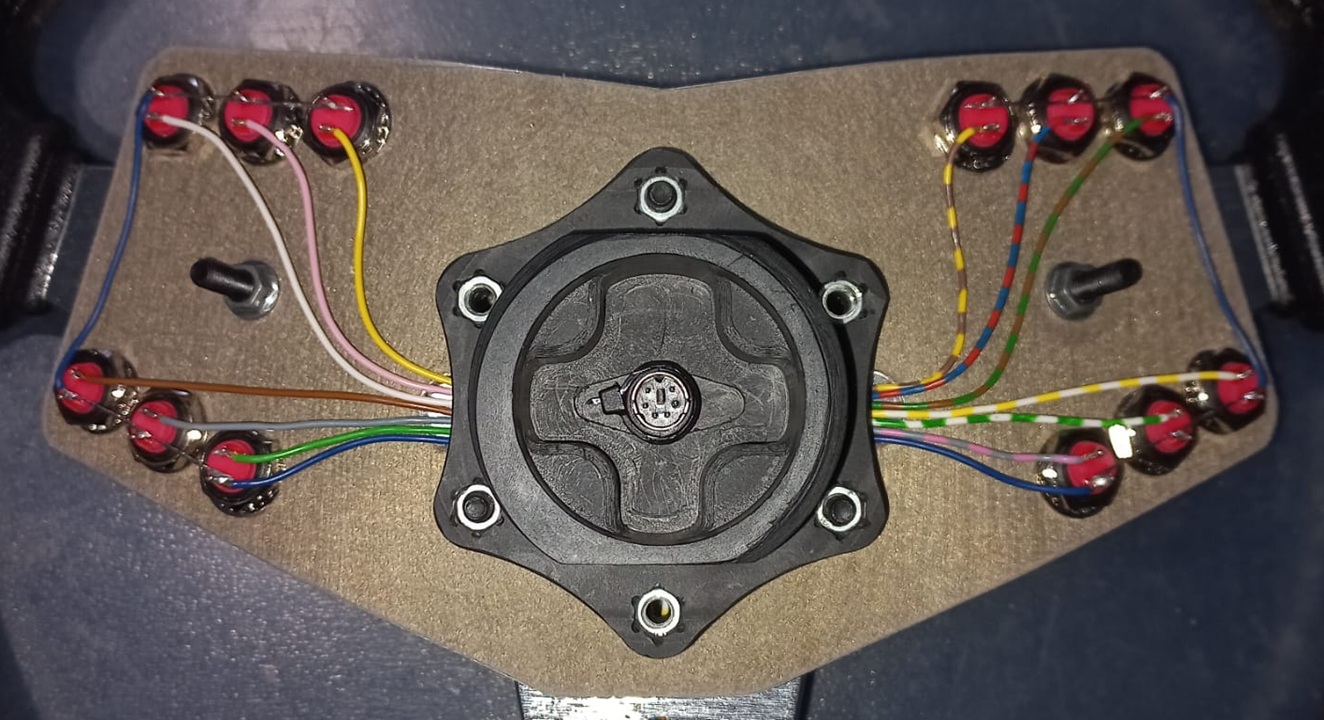
PS/2 mini-DIN Connector: Because Thrustmaster still lives in 1998.
-
Wiring: Thin gauge, not speaker wire from your grandfather’s attic.
-
Enclosure: 3D printed, PVC, project box… whatever keeps the spaghetti of wires hidden.

-
Mounting hardware: Screws, nuts, glue, swearing.
-
Soldering gear — If you can smell burning plastic, you’re doing it right.
-
Leather or Alcantara cover: Optional. Fancy. Feels great.
The build process: Bringing it together
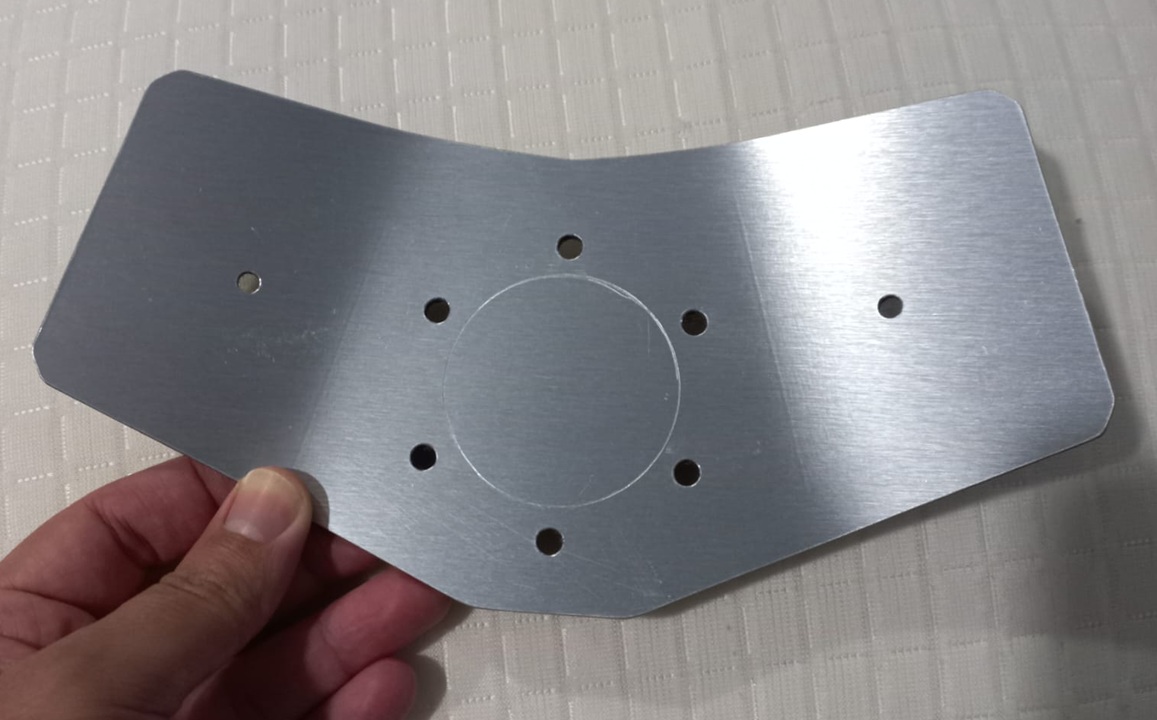
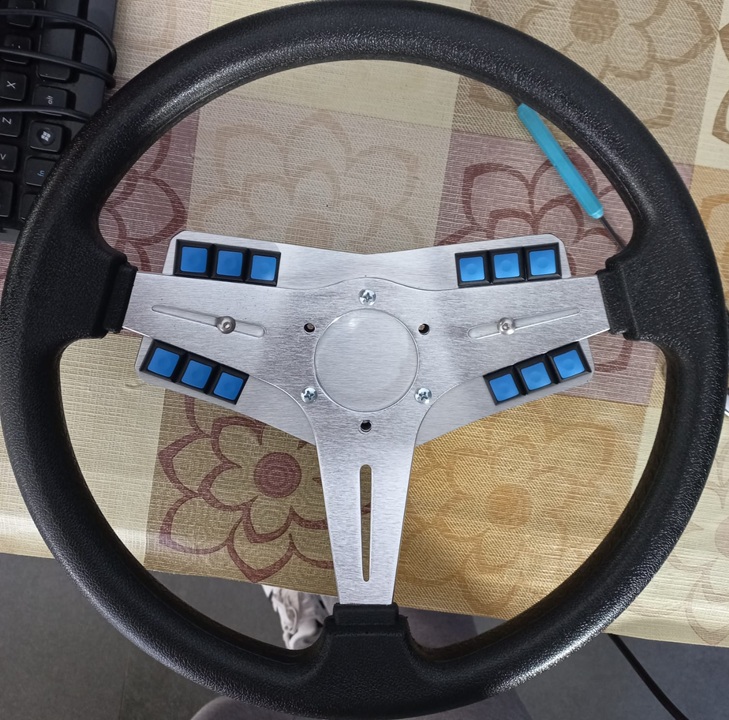
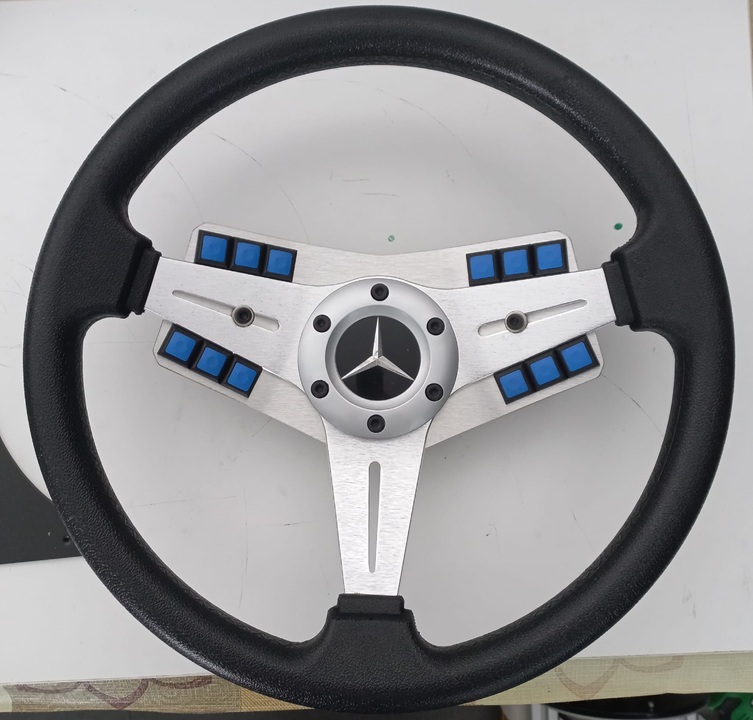
First, start by building a plate to secure the buttons. Then you sandwich it between the wheel and the adapter. Sounds simple, it’s not. You’ll tighten it, loosen it, check alignment, re-tighten it, question your life choices, then tighten it again.
Then comes the button layout. This is where you pretend you’re an engineer at Ferrari designing the next F1 wheel. Try to place the buttons where you can actually reach them instead of where they “look cool.”
I stuffed the Arduino inside the horn cavity because it fit. You can put it in an enclosure on the back if you want to feel more “professional.”
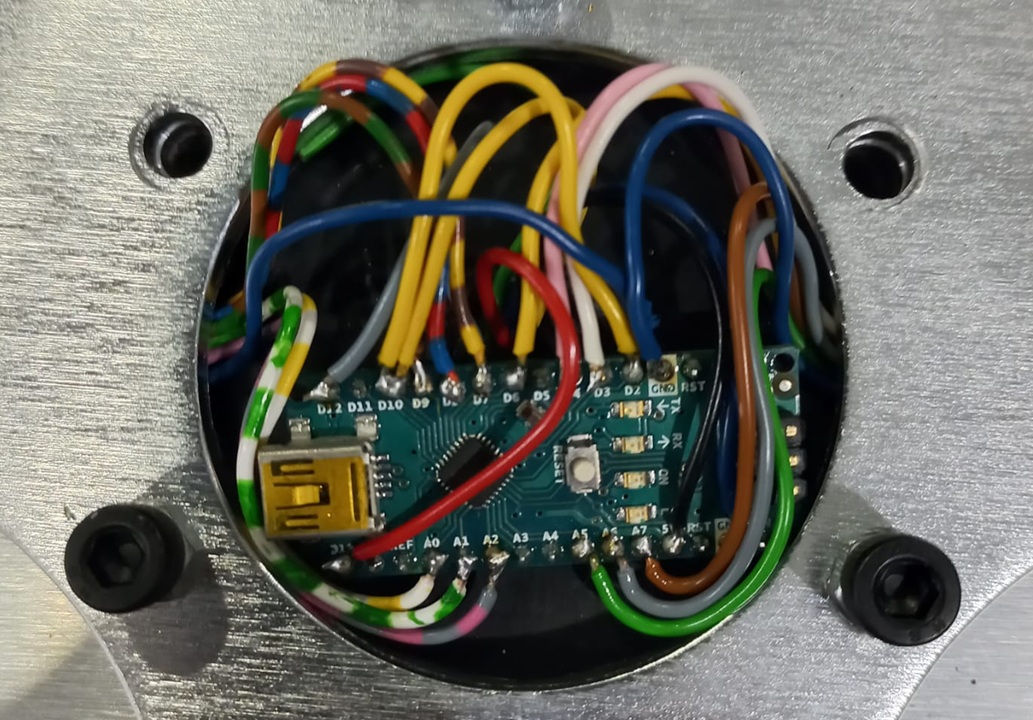
Arduino setup/code and wiring
Here’s where things get spicy. The T300 talks to its wheels using a protocol that feels like it was reverse-engineered from ancient hieroglyphs. Luckily, some genius on the internet already figured it out, so you don’t have to.
I followed the guide from here:
https://rr-m.org/blog/thrustmaster-t300rs-steering-wheel-arduino-emulator/
This lets your custom Franken-wheel pretend it’s an official Thrustmaster rim so both PC and consoles go, “Oh yeah, looks normal.”
Testing and refinement
Now plug it in and hope nothing catches fire. Open your sim, go to the button mapping screen, and start pressing things. If it works? Great. If not? Congratulations, you’re now an electrician.
Check the wiring. Check the code. Check the connection. Check your sanity. Use the Arduino serial monitor like a detective interrogating suspects.
Eventually everything will work, and when it does, it feels amazing. Then you’ll immediately think, “I should add more buttons.” It never ends.
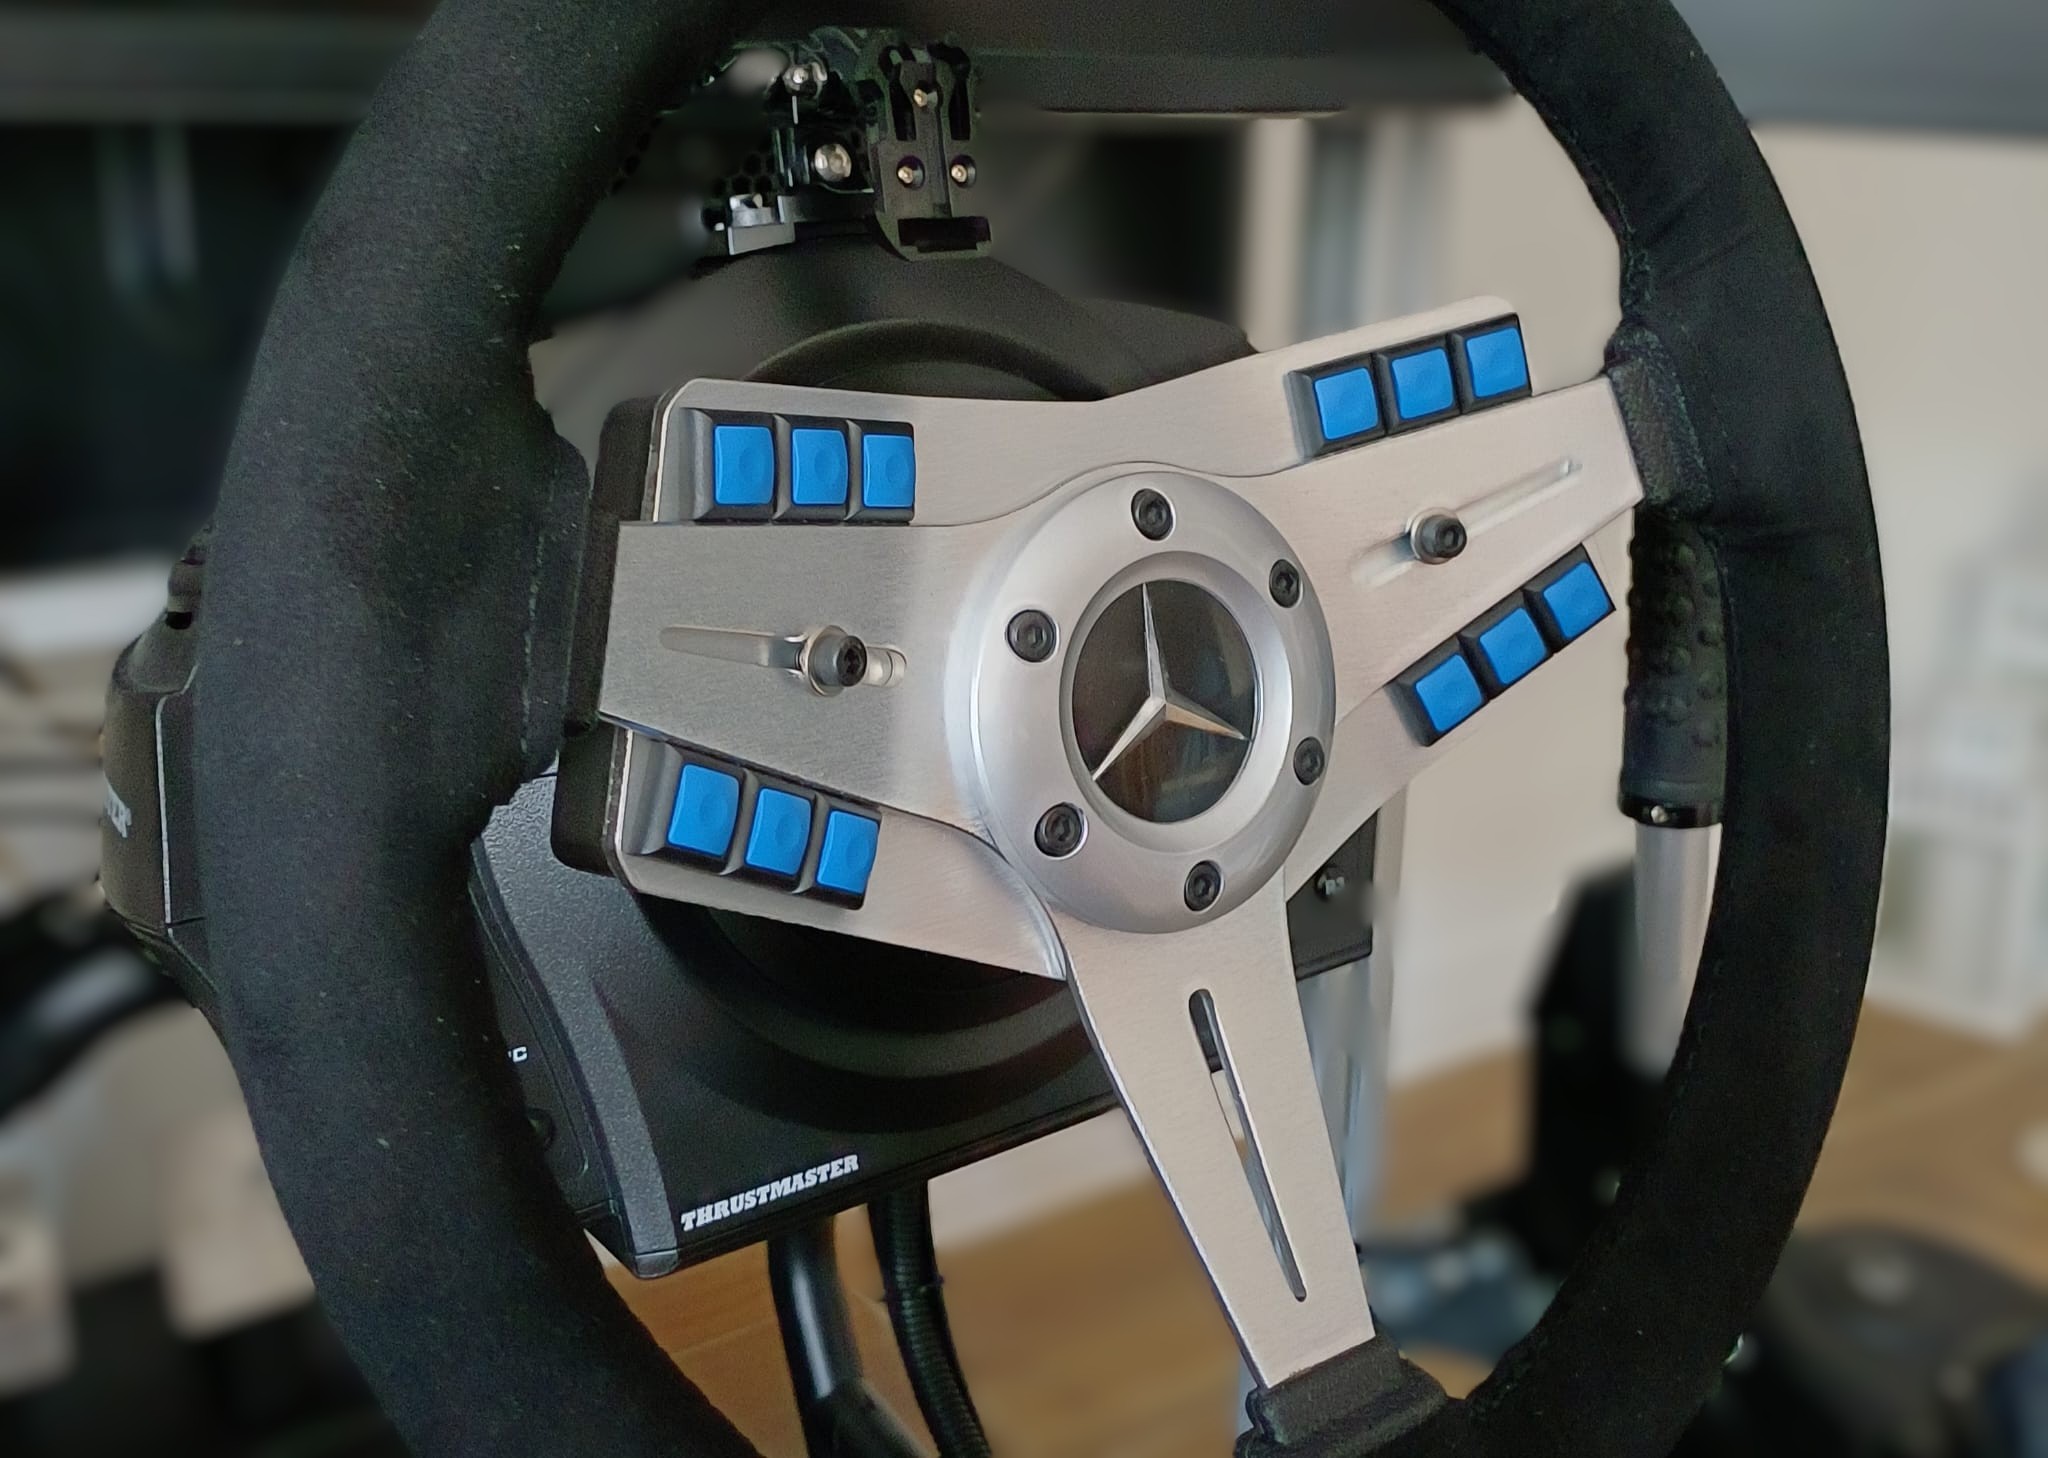
Finished product
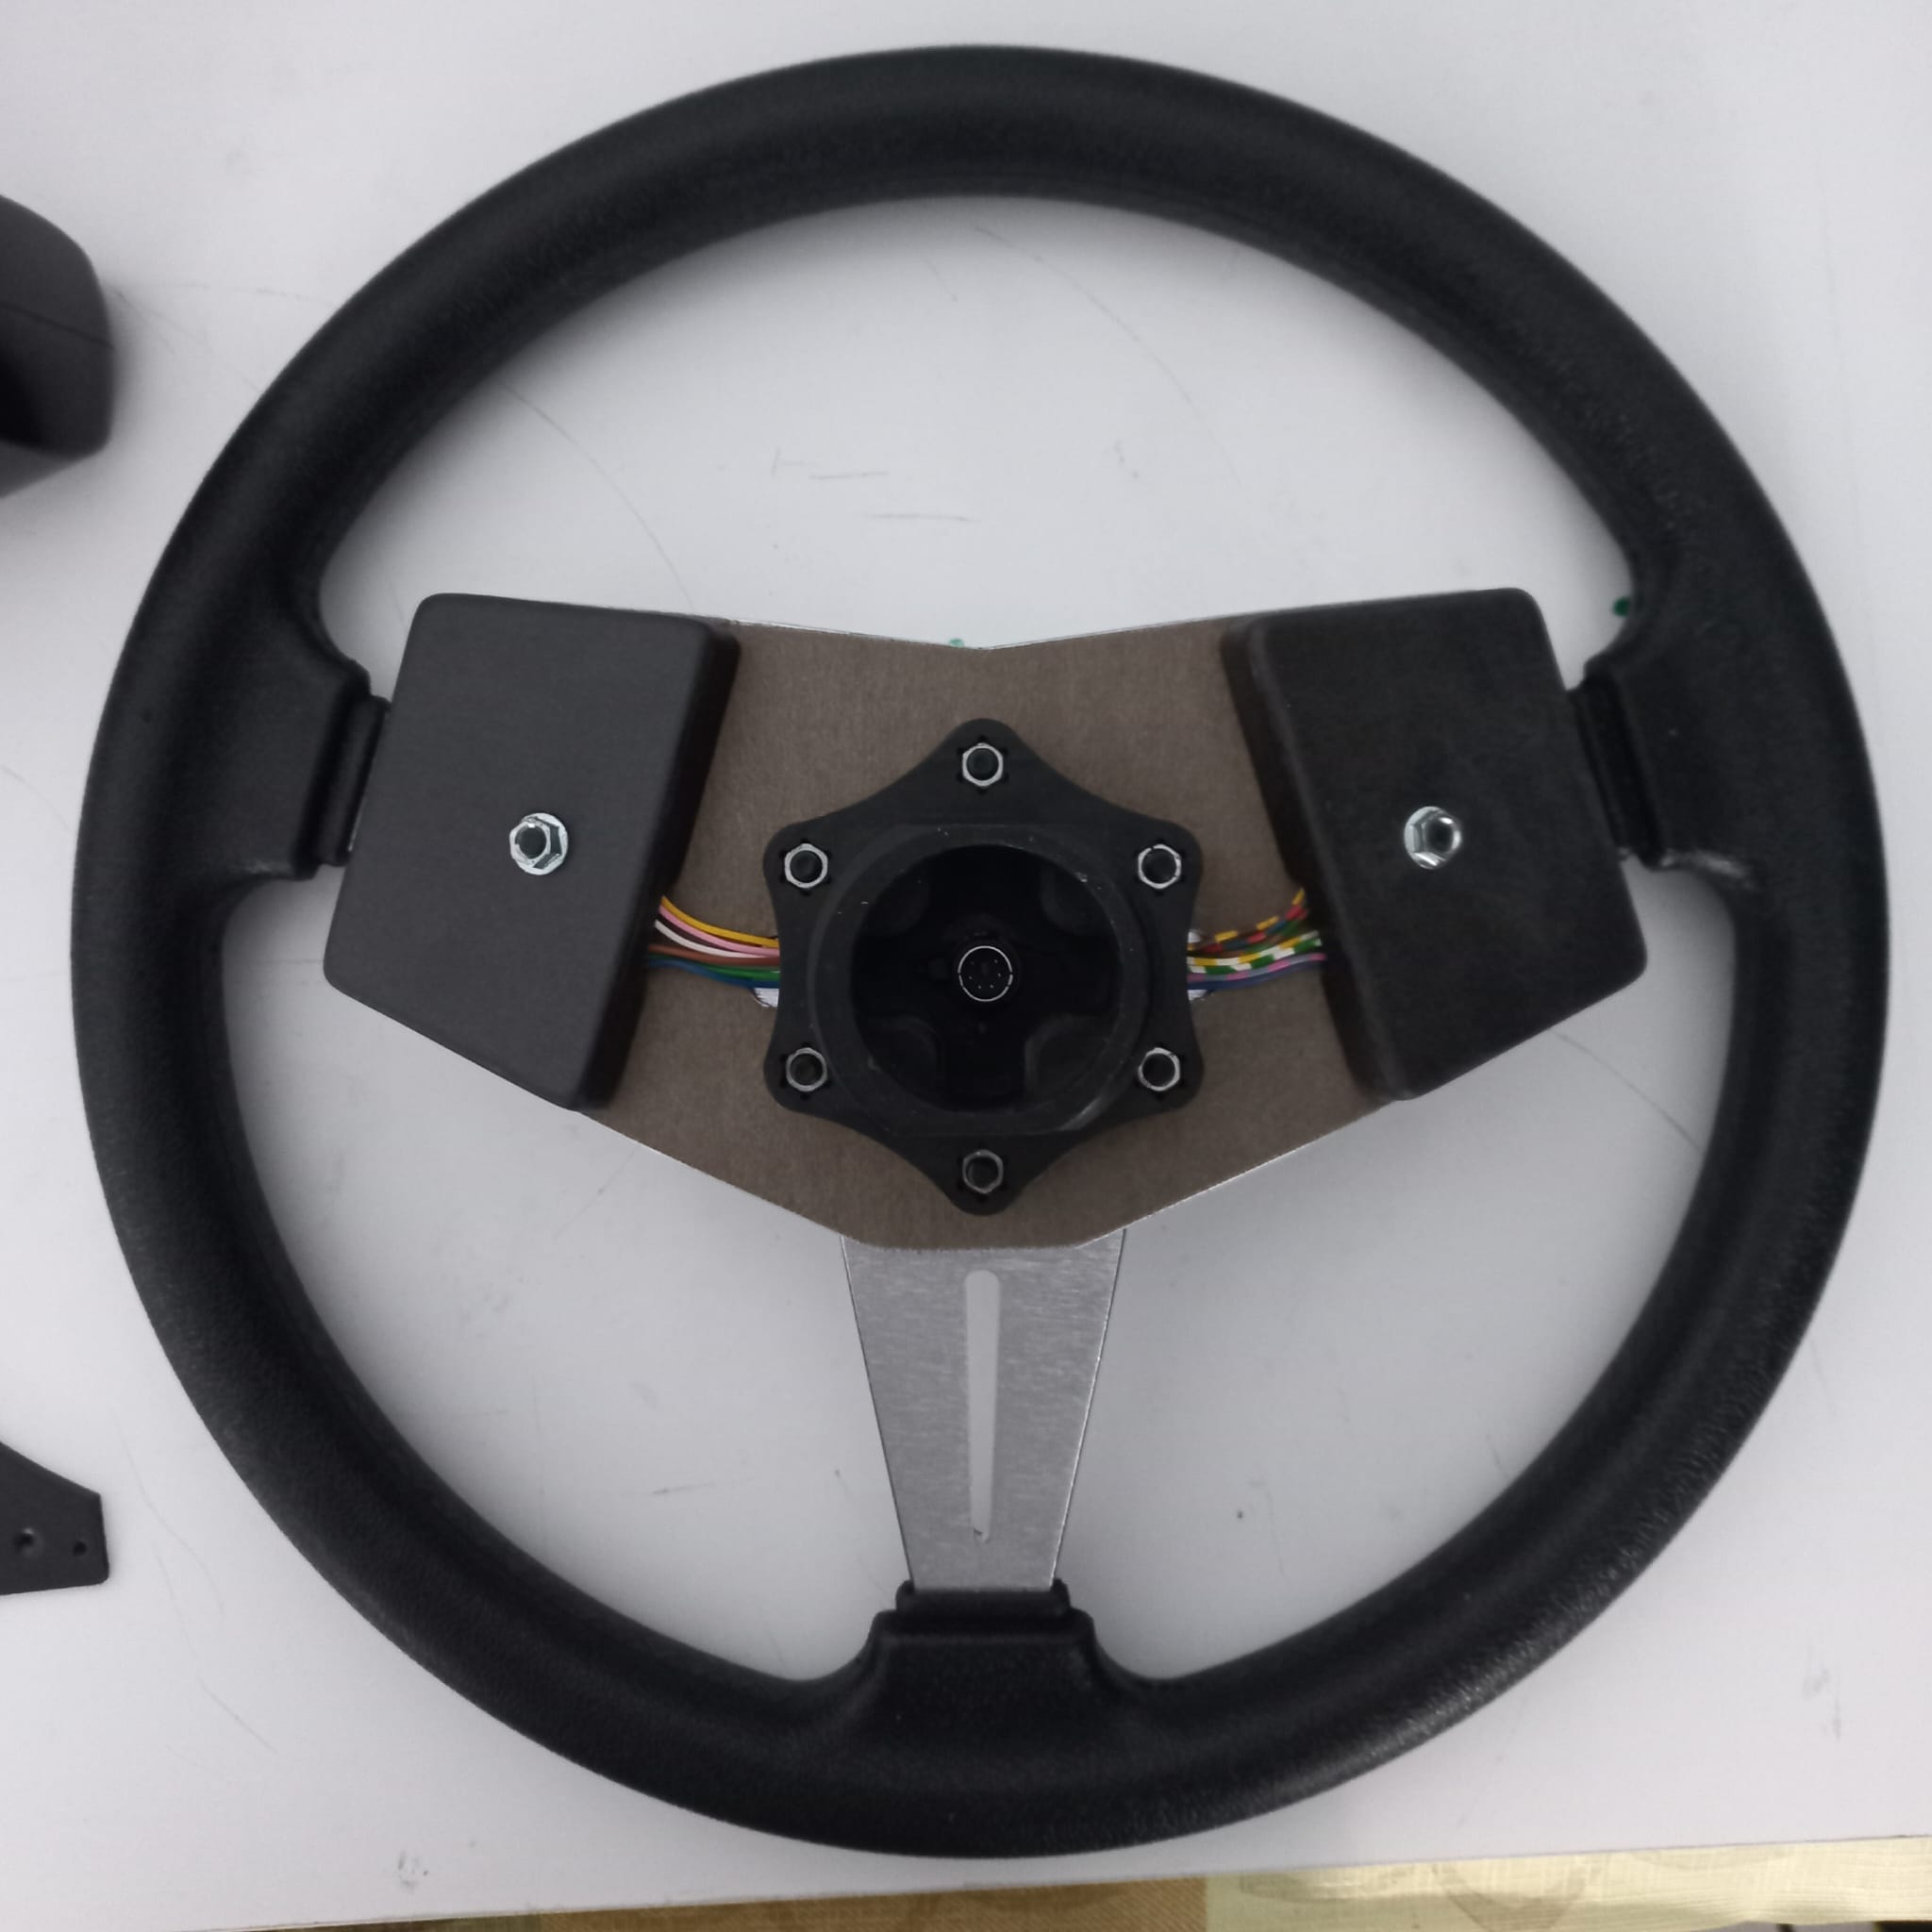
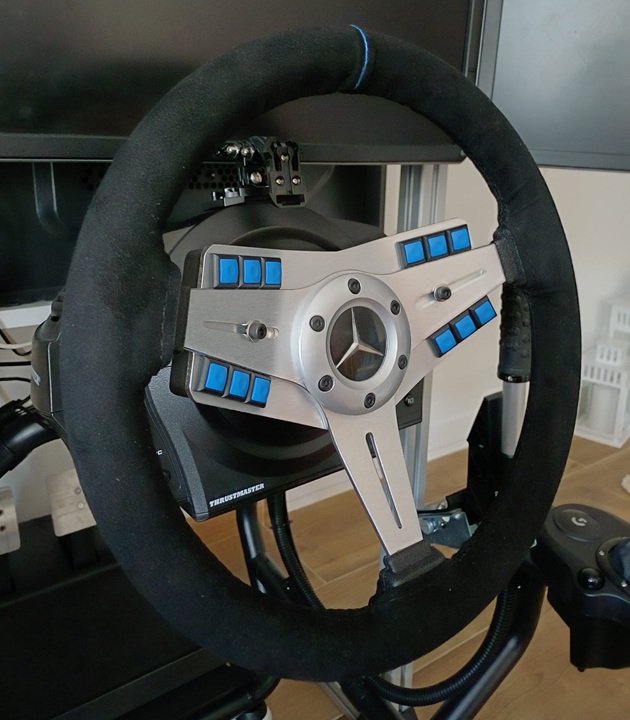
Conclusion
Building a custom 35cm wheel for the Thrustmaster T300 isn’t just a project, it’s a full-on journey of frustration, discovery, minor burns, and huge satisfaction. You end up with a unique, functional piece of hardware that feels way better than anything stock. Plus, it gives you bragging rights every time someone asks, “Where’d you buy that wheel?” and you get to say, “I didn’t. I built it.”
Now get out there and drive like the wheel owes you money.
Comments
No comments yet. Be the first to comment!
Leave a comment