Building The Ultimate Retro Bluetooth Phone Speaker
Look at your living room. What do you have sitting on your shelf playing music? A little gray plastic cylinder that looks like a glorified air freshener? A black brick that has zero personality? It’s pathetic. We used to make things out of metal, thick molded plastic, and machinery heavy enough to use as an improvised home defense weapon.
So instead of spending two hundred bucks on another soul-sucking modern speaker, I did the only logical thing: I bought an ancient rotary phone, tore its guts out with extreme prejudice, and stuffed a modern 2.1 channel audio system inside it. Here is how you take a piece of mid-century telecommunications history and force it to stream your favorite tunes with real, head-splitting mechanical attitude.
Phase 1: Teardown, Demolition, and Nostalgia
First off, old tech isn’t "elegantly simple," it’s a maze of metal brackets, switches, and wires that look like they were woven by angry spiders. Opening up a vintage rotary phone isn't like taking apart a modern gadget where three plastic clips snap off and you’re done. You need tools, manual skill and enough patience to not throw the whole assembly through a window.
Once you clear out the miles of ancient copper wire, the original mechanical ringer bell, and the useless internal switches, you realize you're left with an awesome, ultra-heavy frame. The chassis has genuine weight to it, anchored by heavy mounting studs and solid metal brackets. The goal here is simple: salvage the awesome mechanical elements, like the rotary dial wheel and the main cradle frame, and trash literally everything else that isn’t structurally useful.
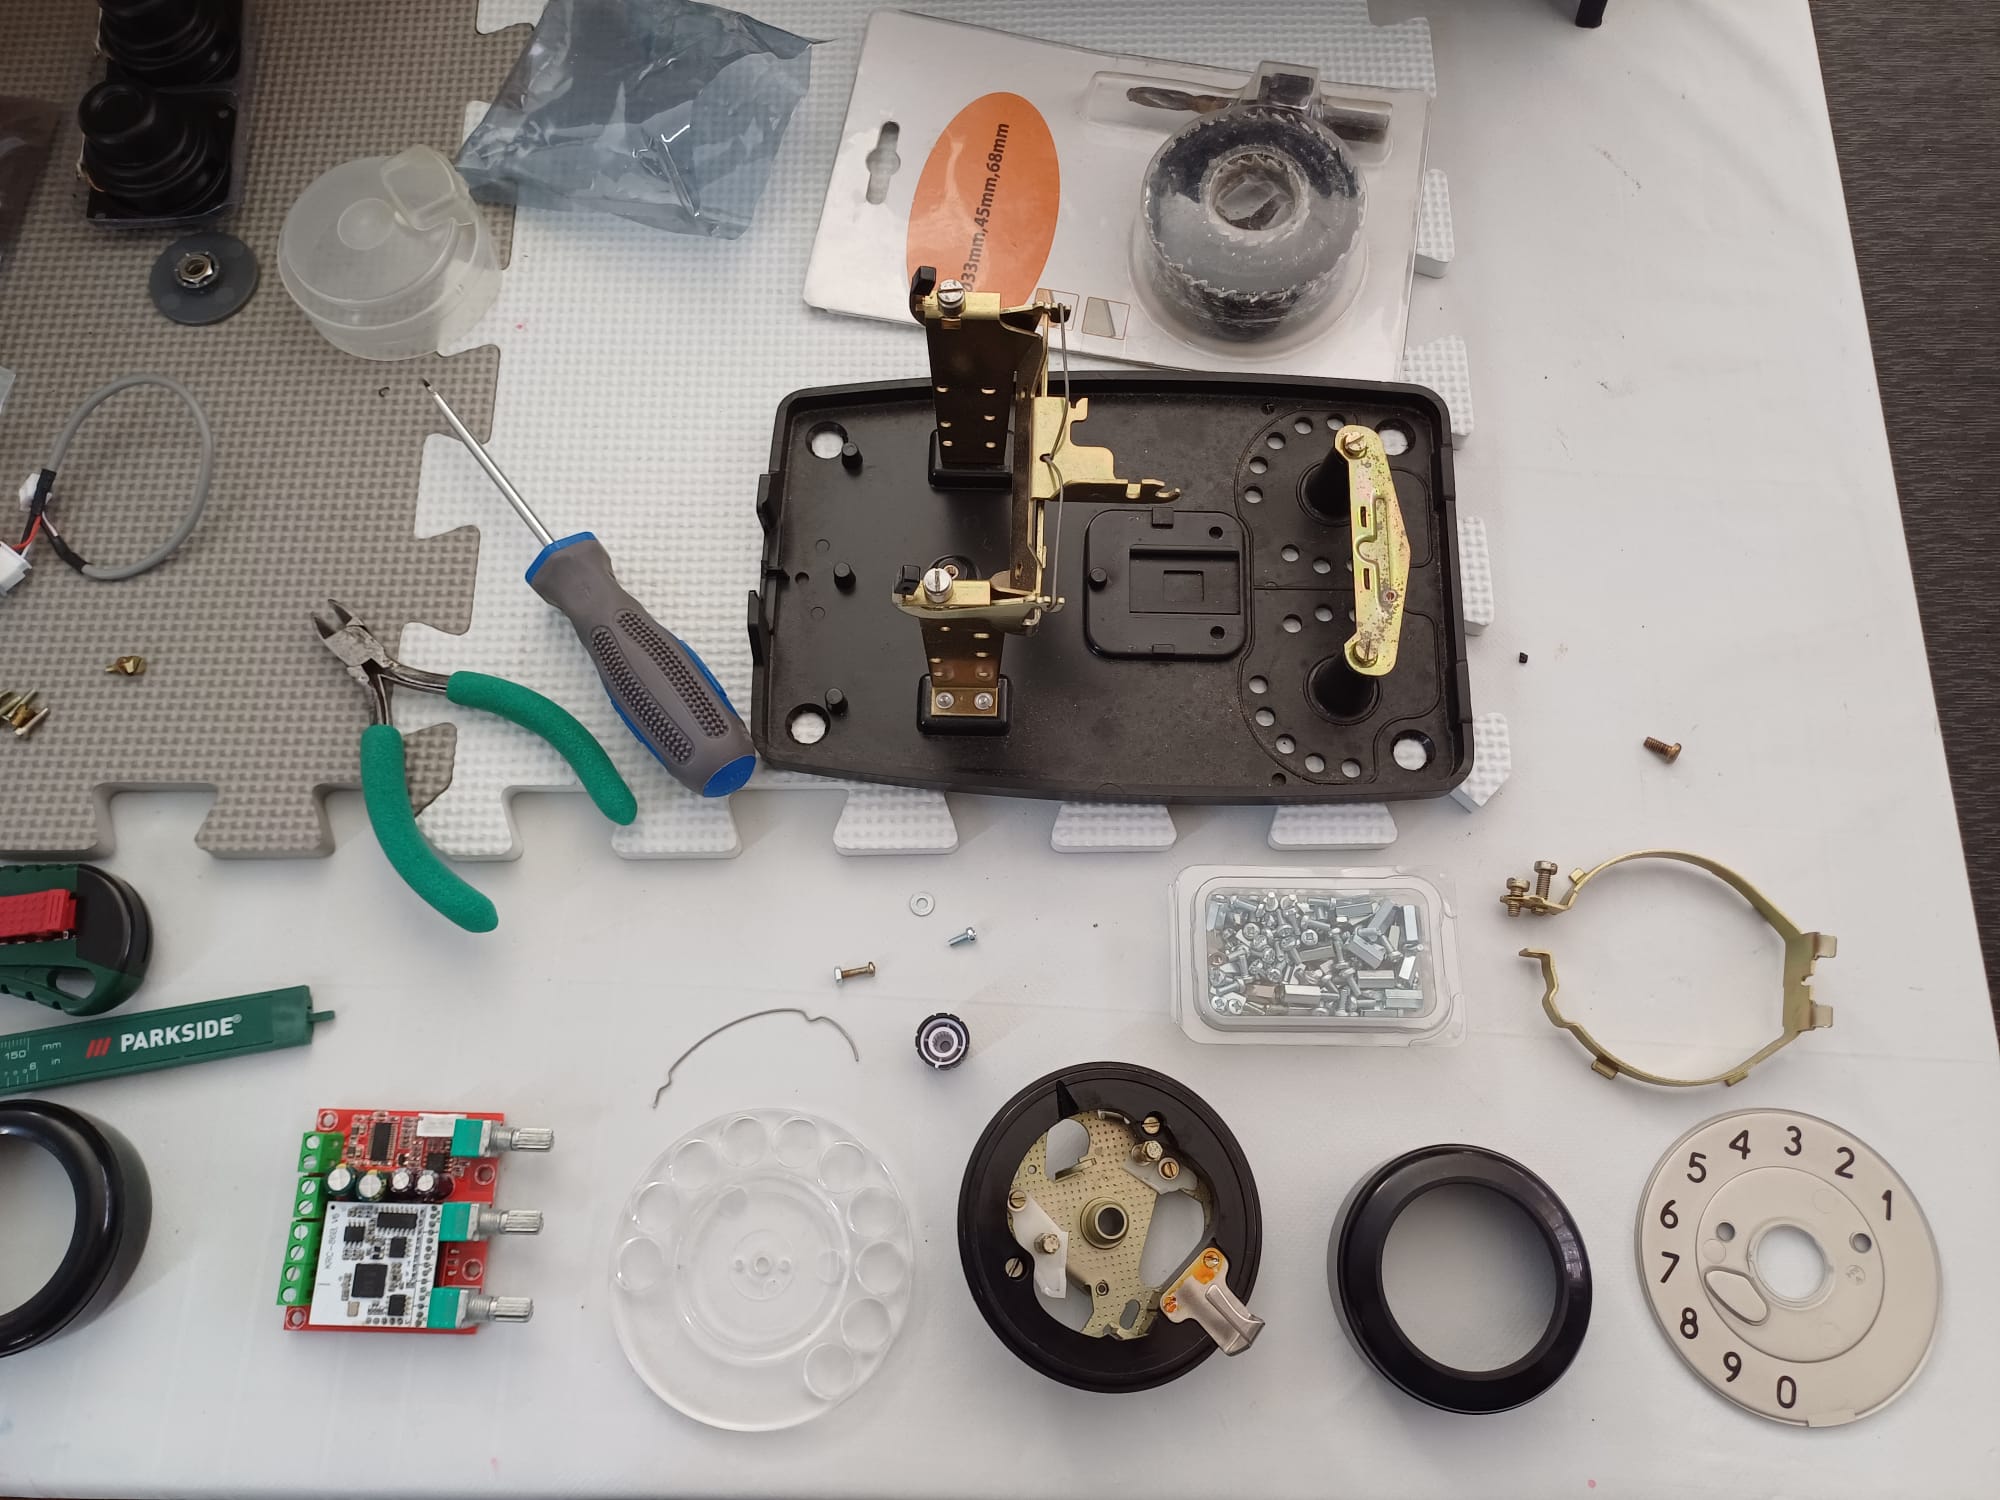
Phase 2: Cramming Modern Hardware Into Vintage Shells
This is where the real engineering starts. You aren't just putting a tiny cheap speaker in a plastic box; you’re retrofitting a full 2.1 channel amplifier board into an enclosure never meant to hold digital electronics.
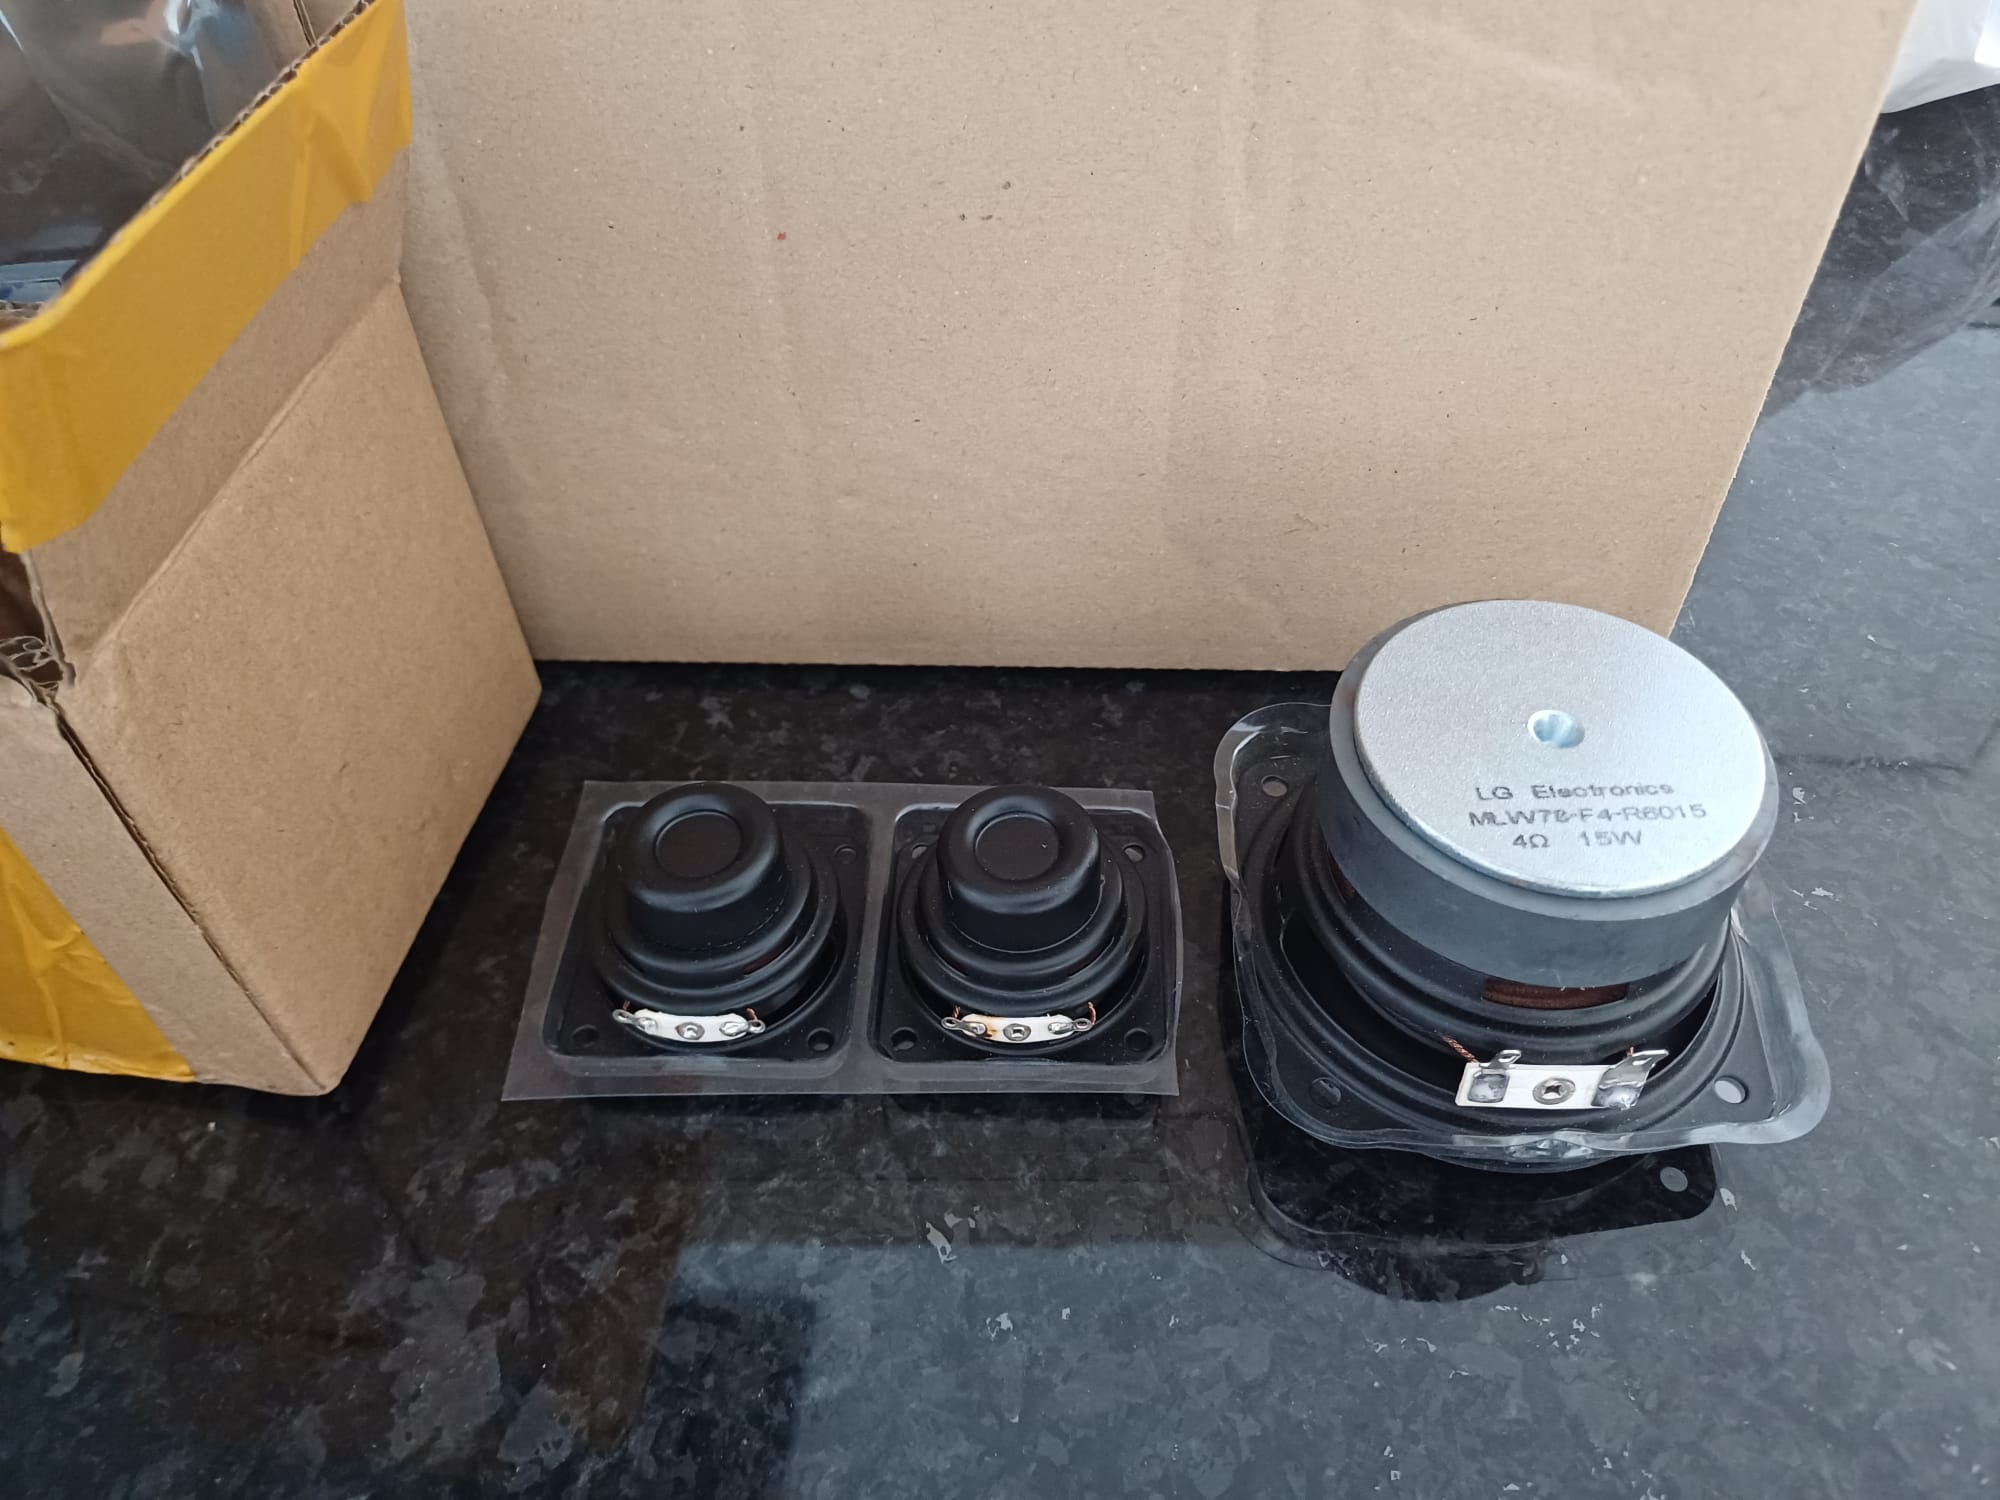
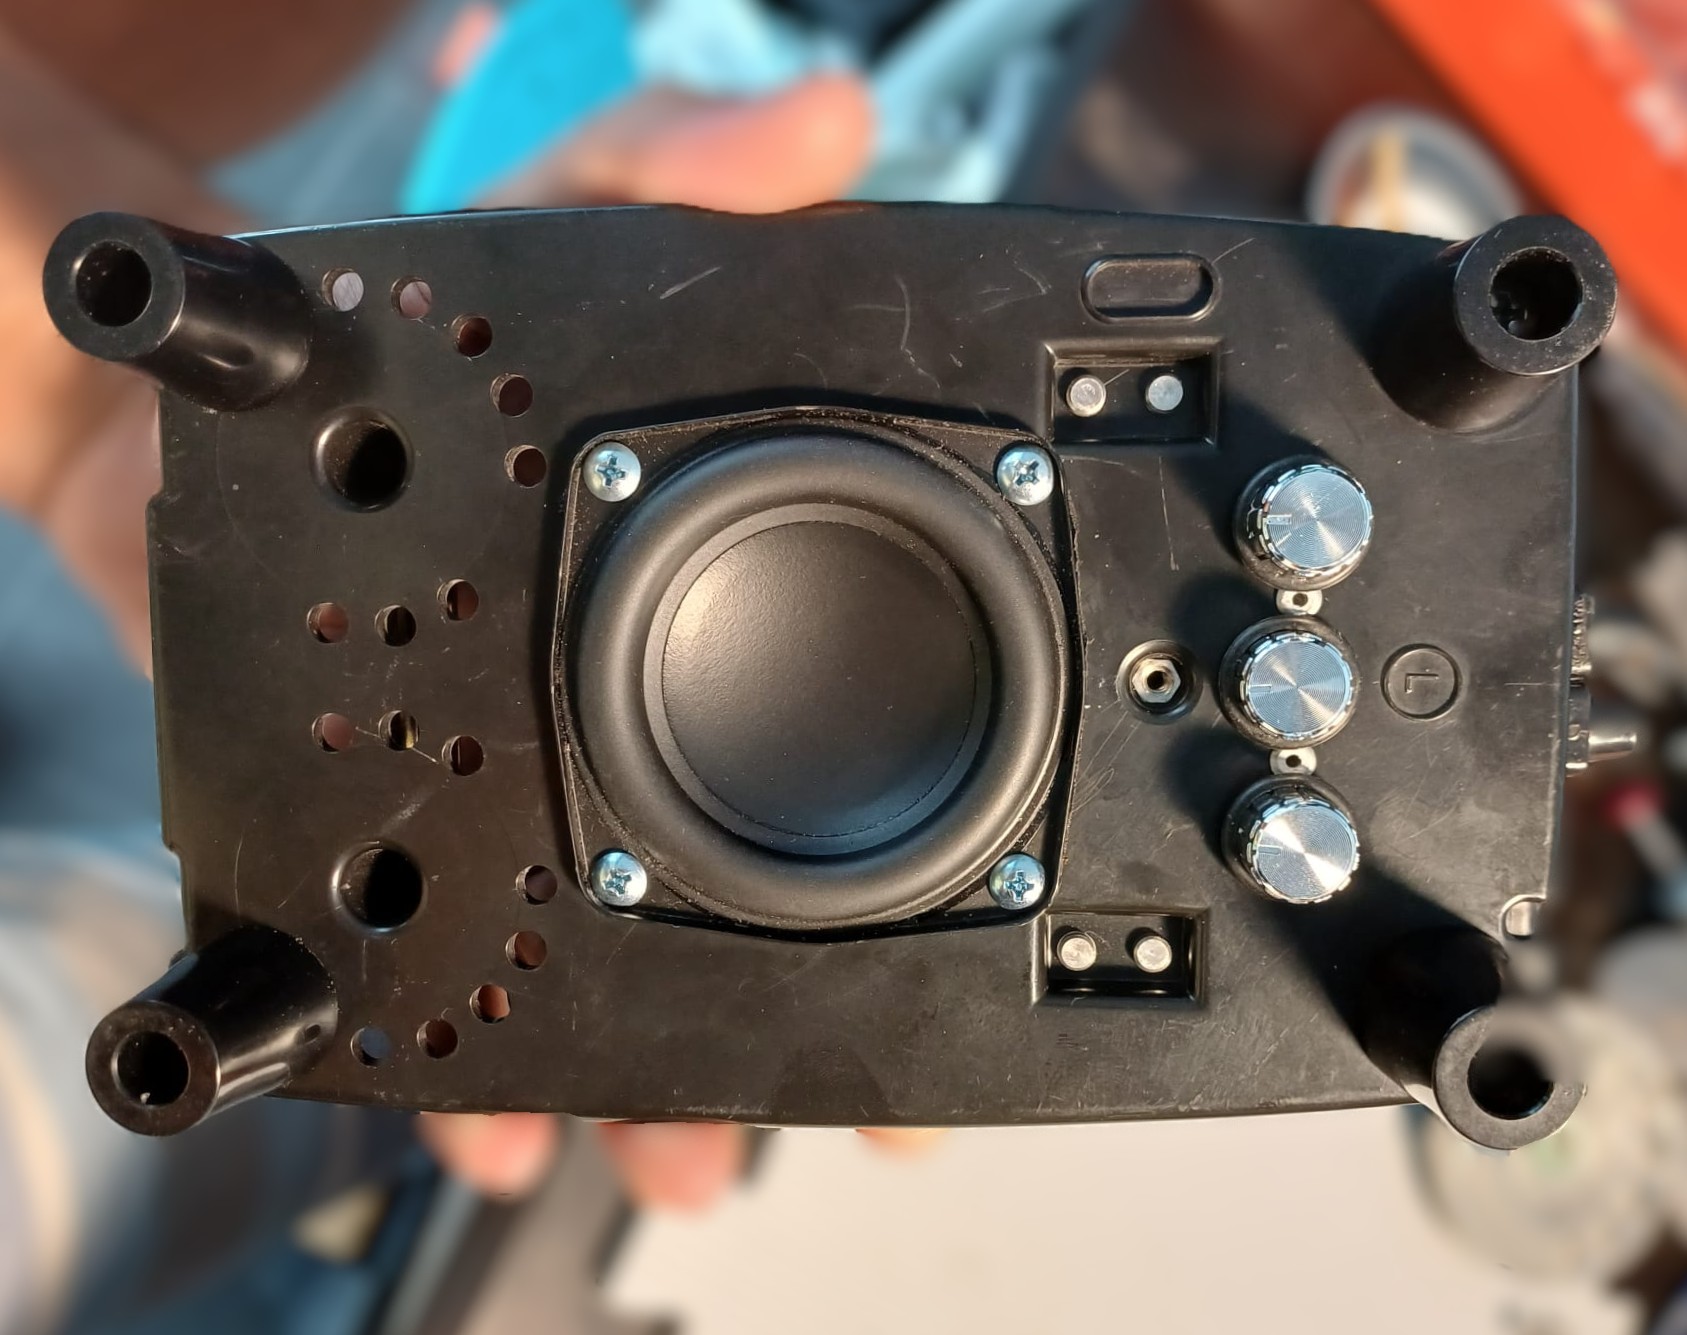
The Downward-Firing Subwoofer: You have to mount a dedicated bass driver directly into the bottom casing. That means carefully measuring, cutting out the plastic baseplate, and securing the driver frame with heavy-duty screws so it rattles the entire desk when the low end hits.
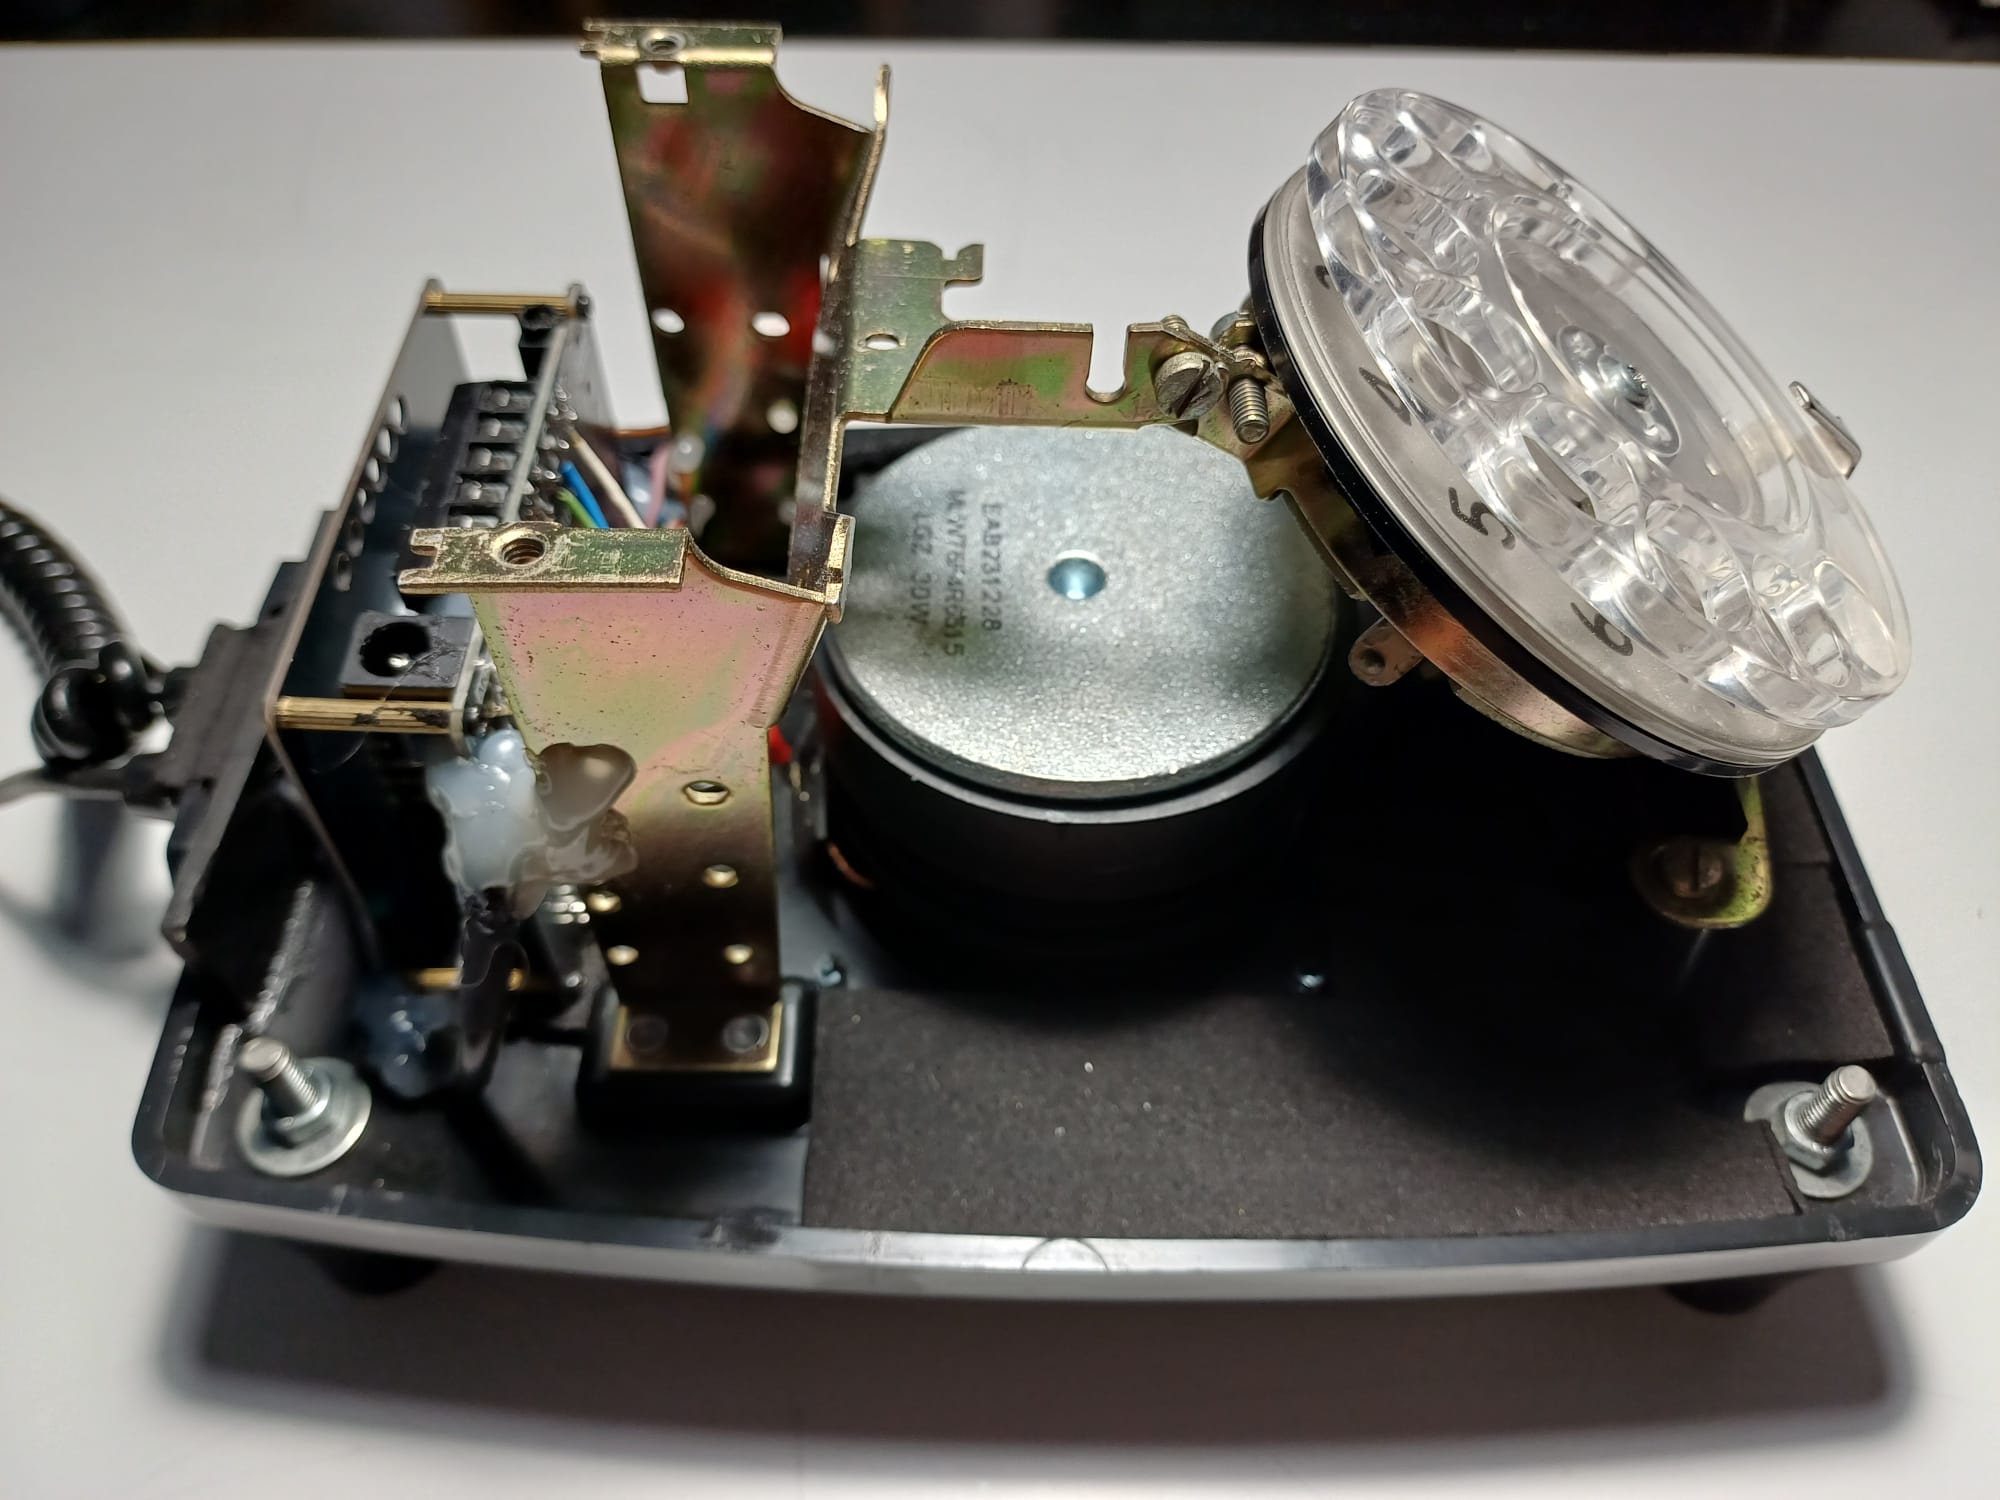
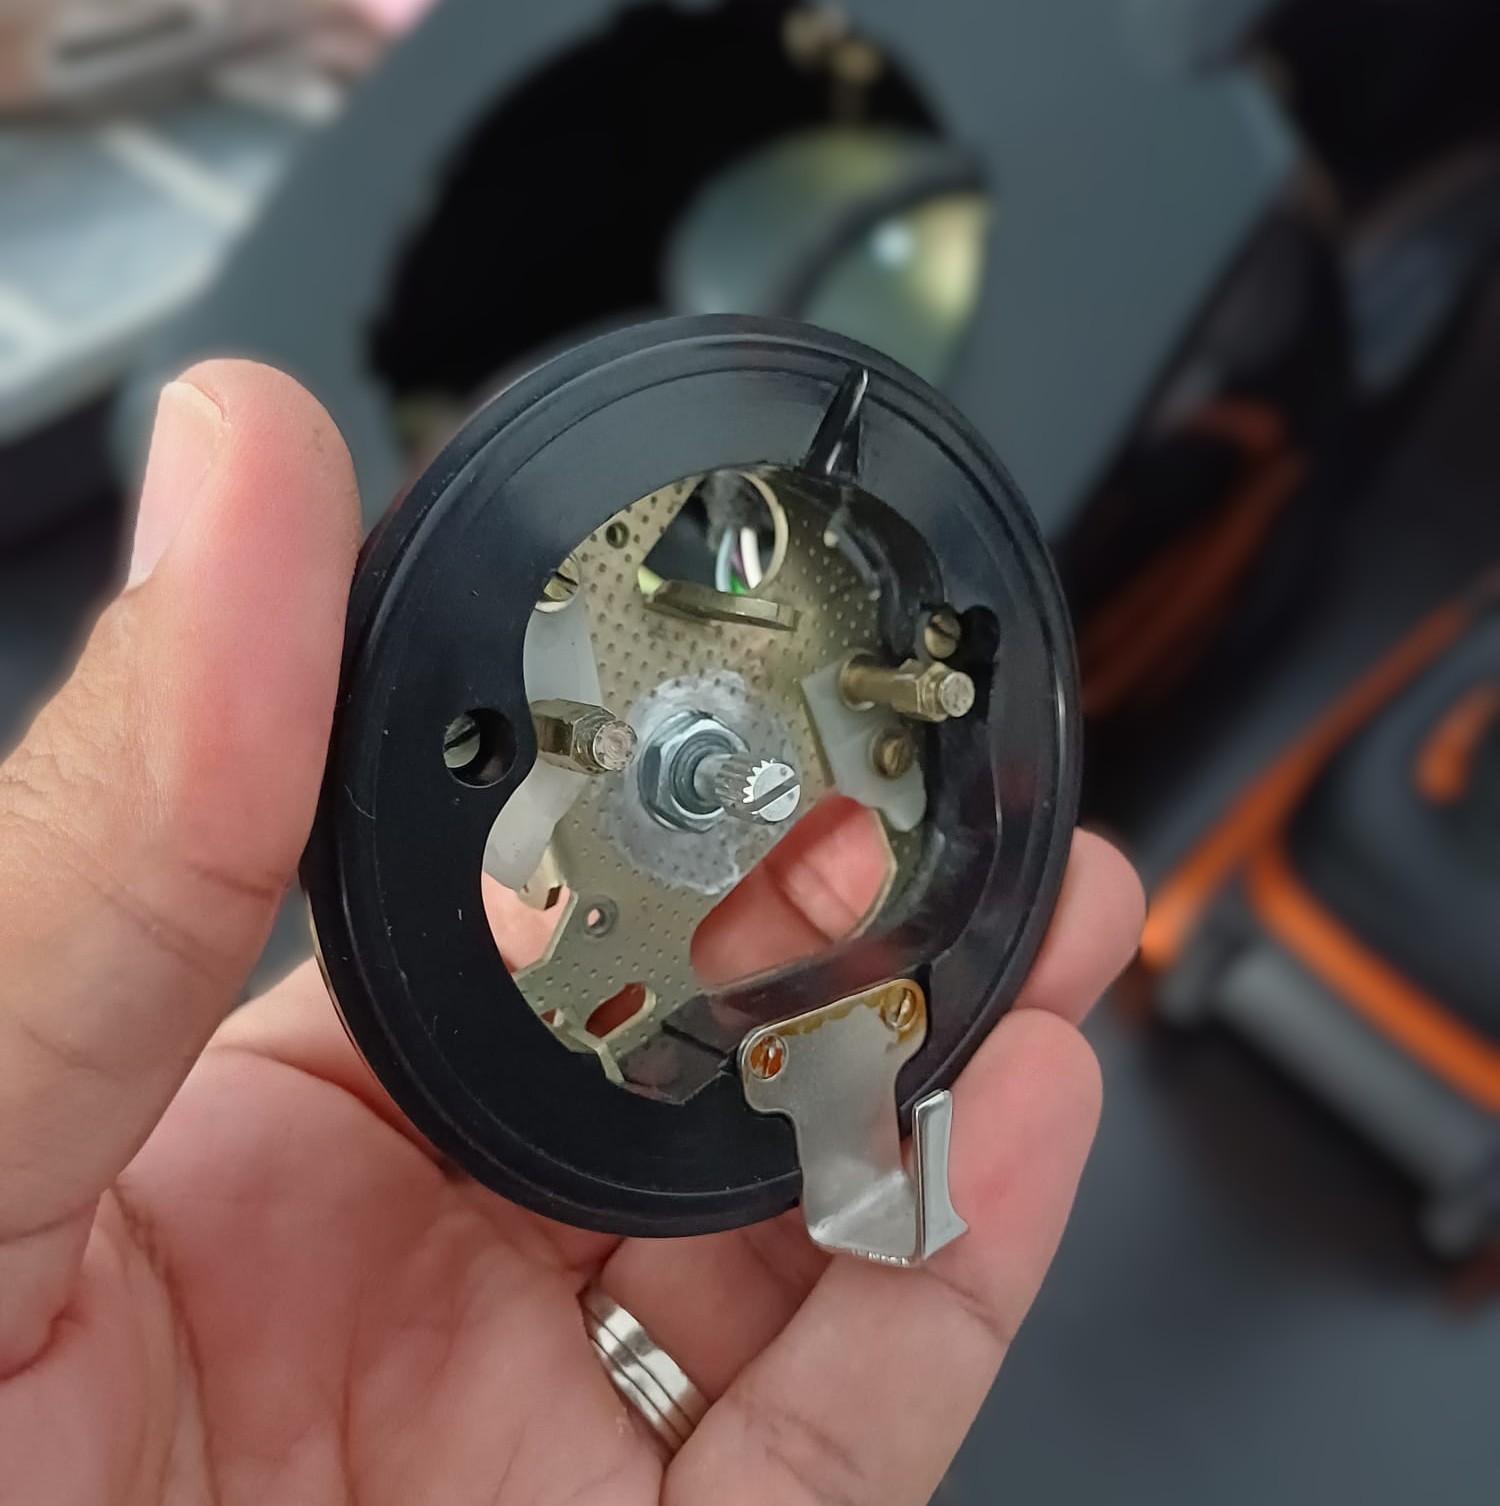
Potentiometers and External Controls: I mounted the amp in a way that the potentiometers would exit through the chassis at the underside so you can adjust treble and bass levels directly on the phone body using sleek metallic knobs. The volume is controlled by the front rotary dial, more on that below.
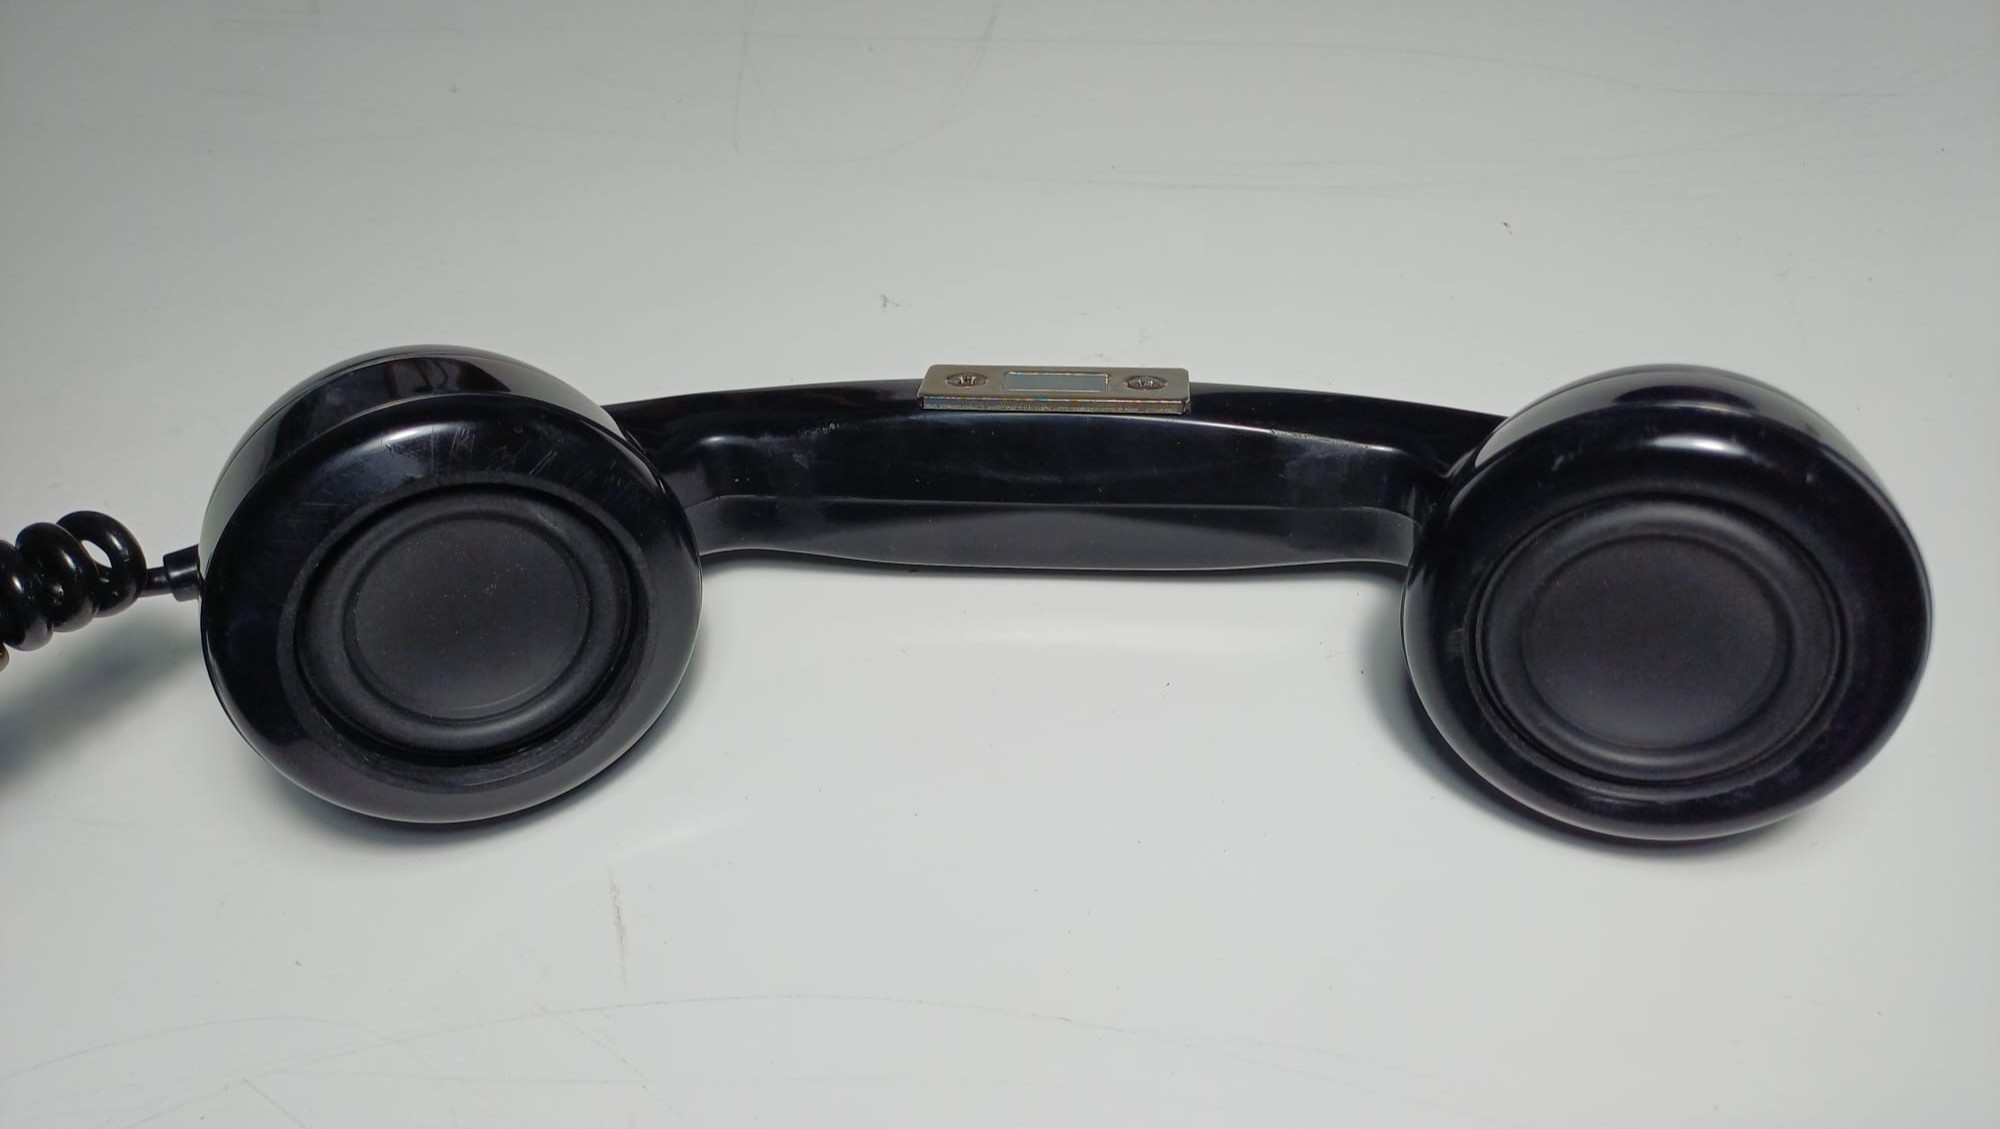
The Handset Stereo Transformation: The original ear and mouth pieces on these old handsets were built for terrible mid-century voice calls. I completely gutted both ends of the hard plastic handset shell and retrofitted full-range audio drivers directly into each cup, converting the handset into a high-powered stereo speaker bar.
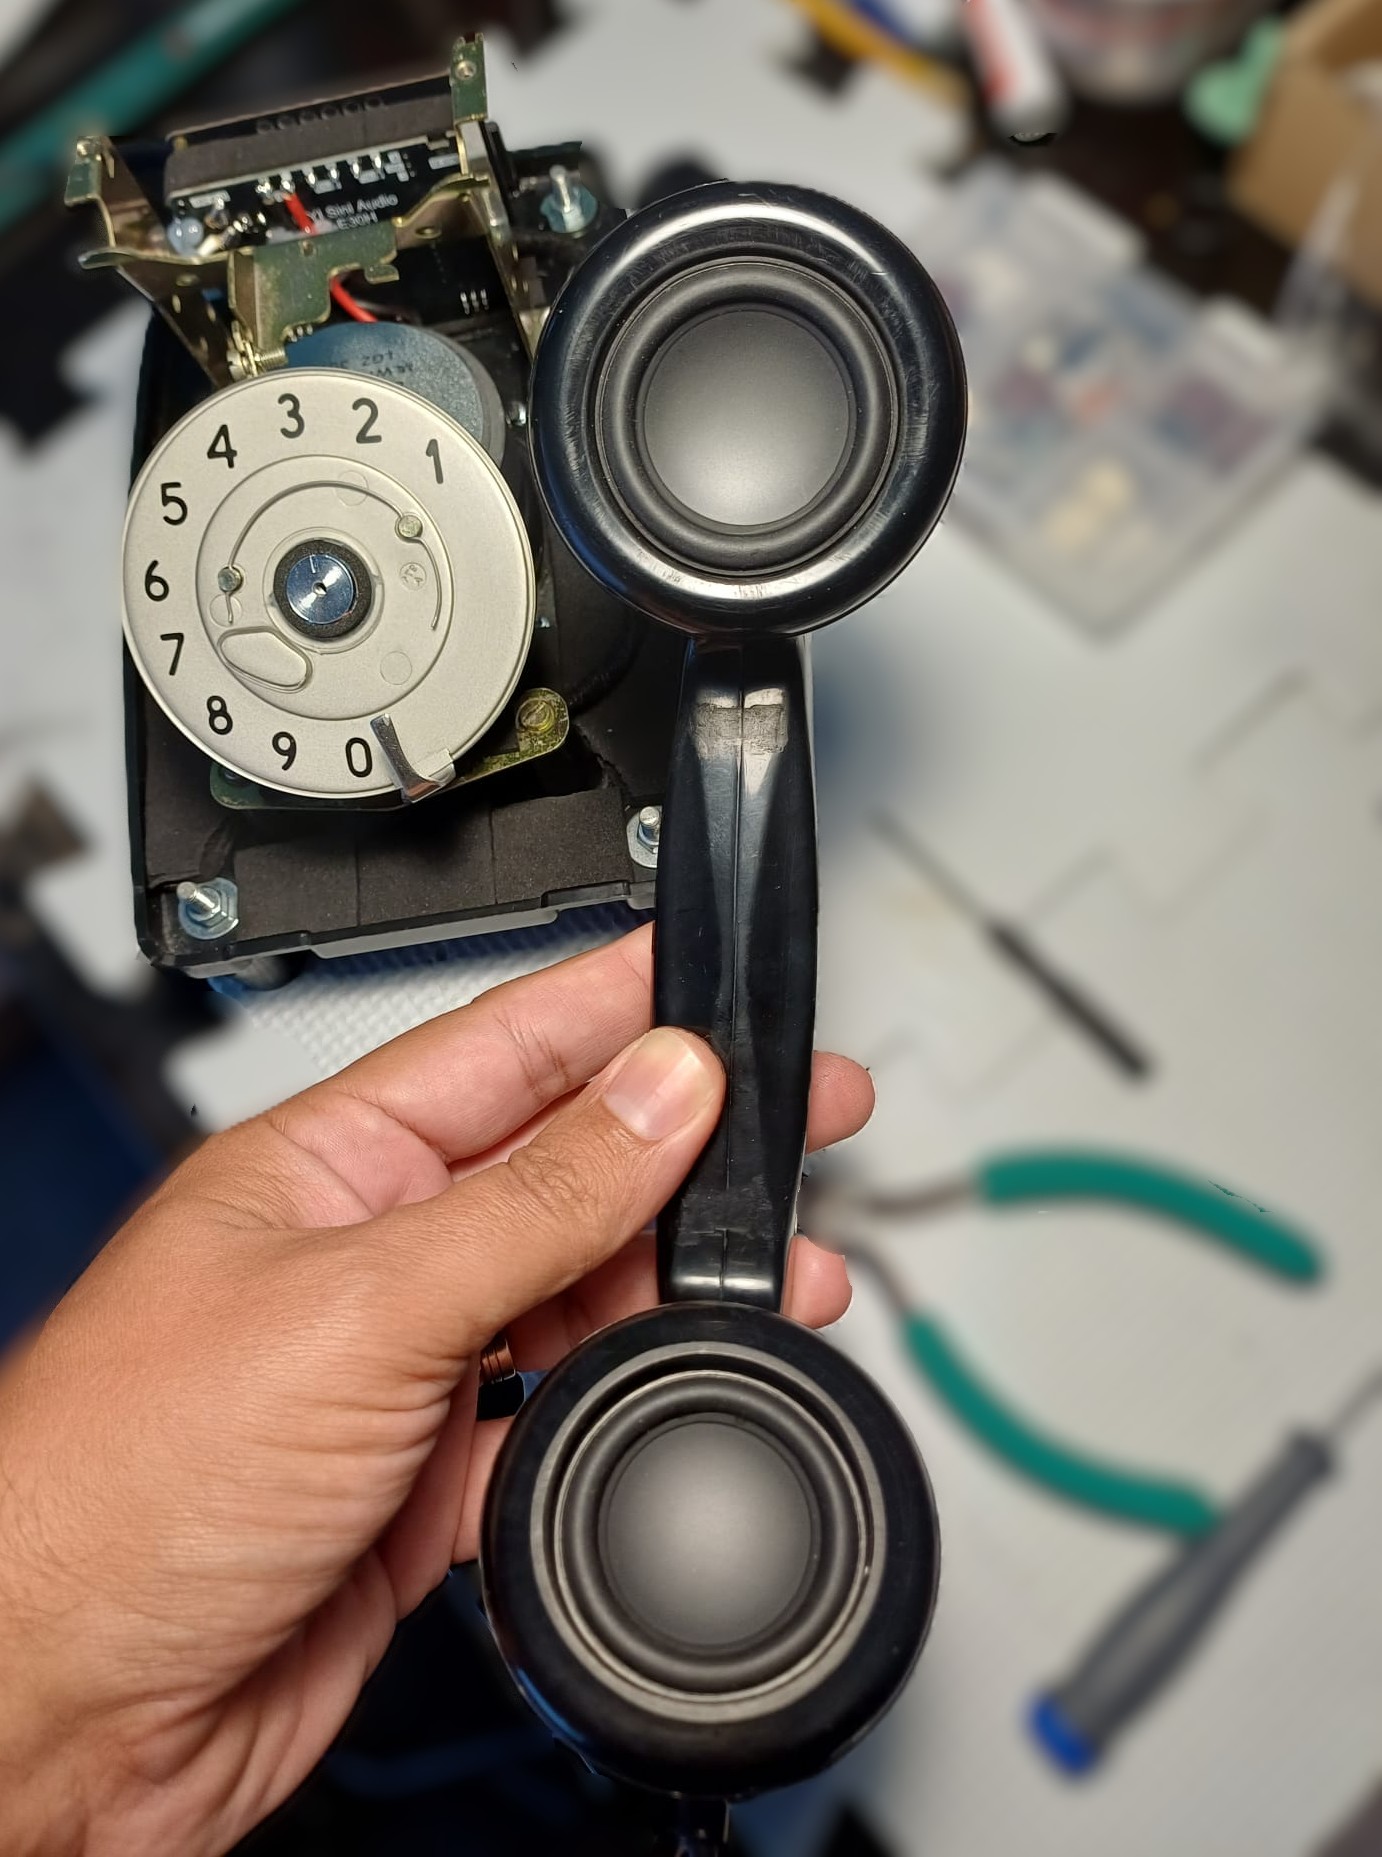
Power Supply Integration: To feed the amp board enough juice without melting it, you need a dedicated power brick, in this case, a solid 12V 4.16A DC adapter feeding right into the amp board.
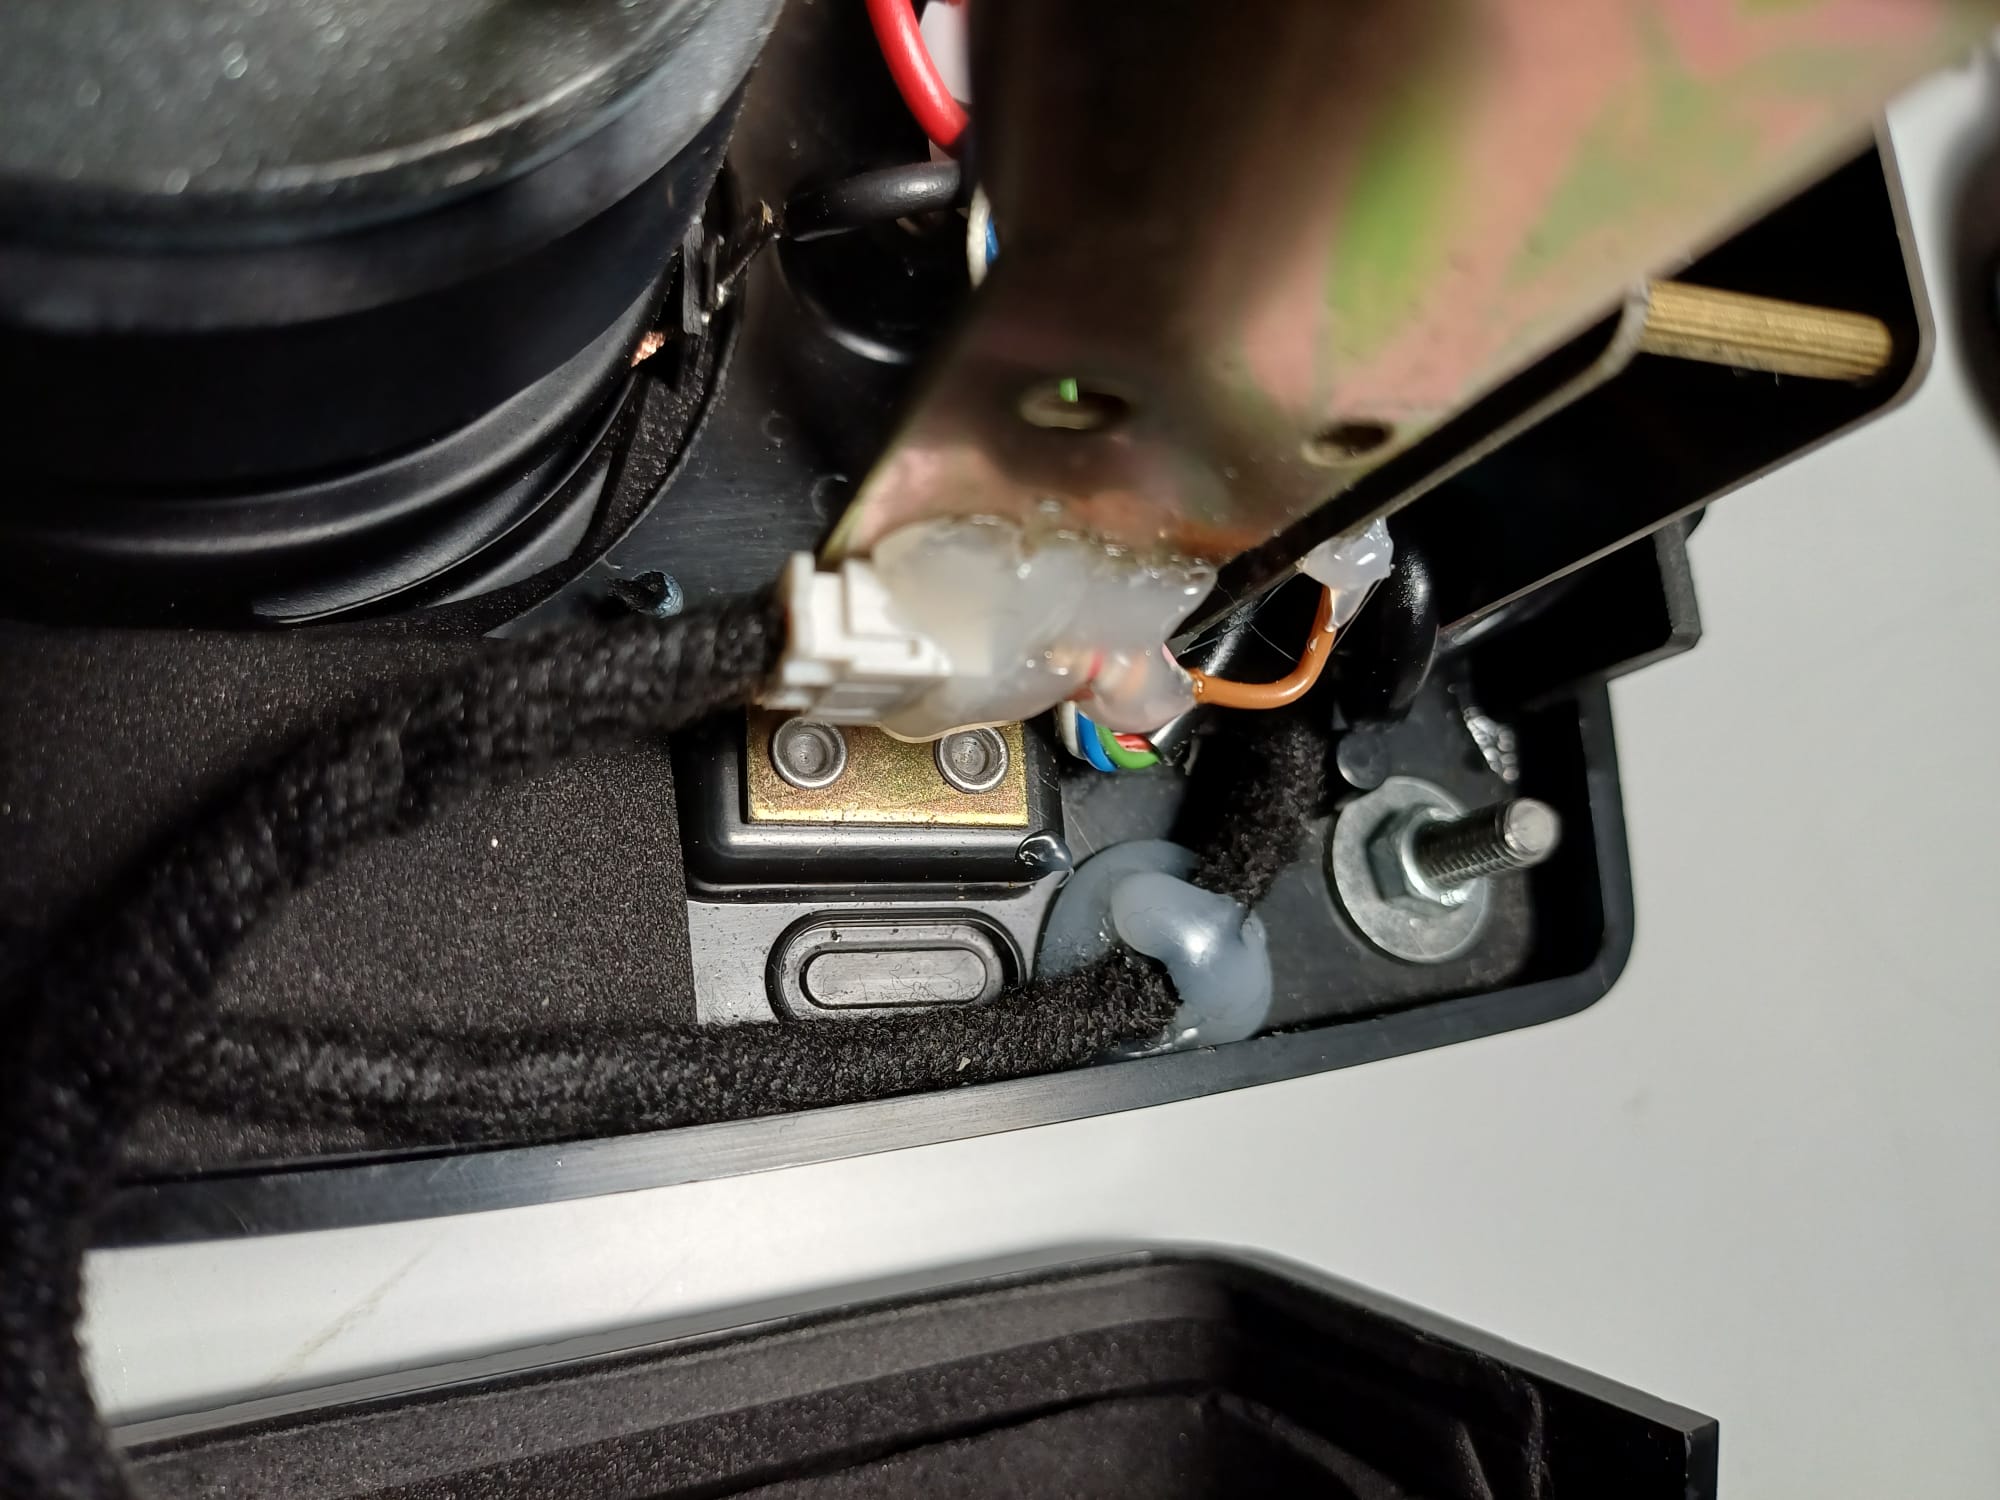
The Hot Glue Reality: High-end engineers will tell you to 3D-print custom mounting brackets for every tiny wire. Real DIYers know that industrial-grade hot glue, threaded brass standoffs, and heat-shrink tubing are what actually keep the universe together. If it doesn't move and it's covered in clear adhesive, it will survive an earthquake.
Phase 3: Magnetic Mounts and Rotary Dial Wiring
The trickiest part of the whole build is making sure the vintage mechanical hardware actually works seamlessly with modern electronics without ruinous over-complication. Forget delicate micro-switches in the hook mechanism that break after a week, we are going full industrial-grade custom work here.
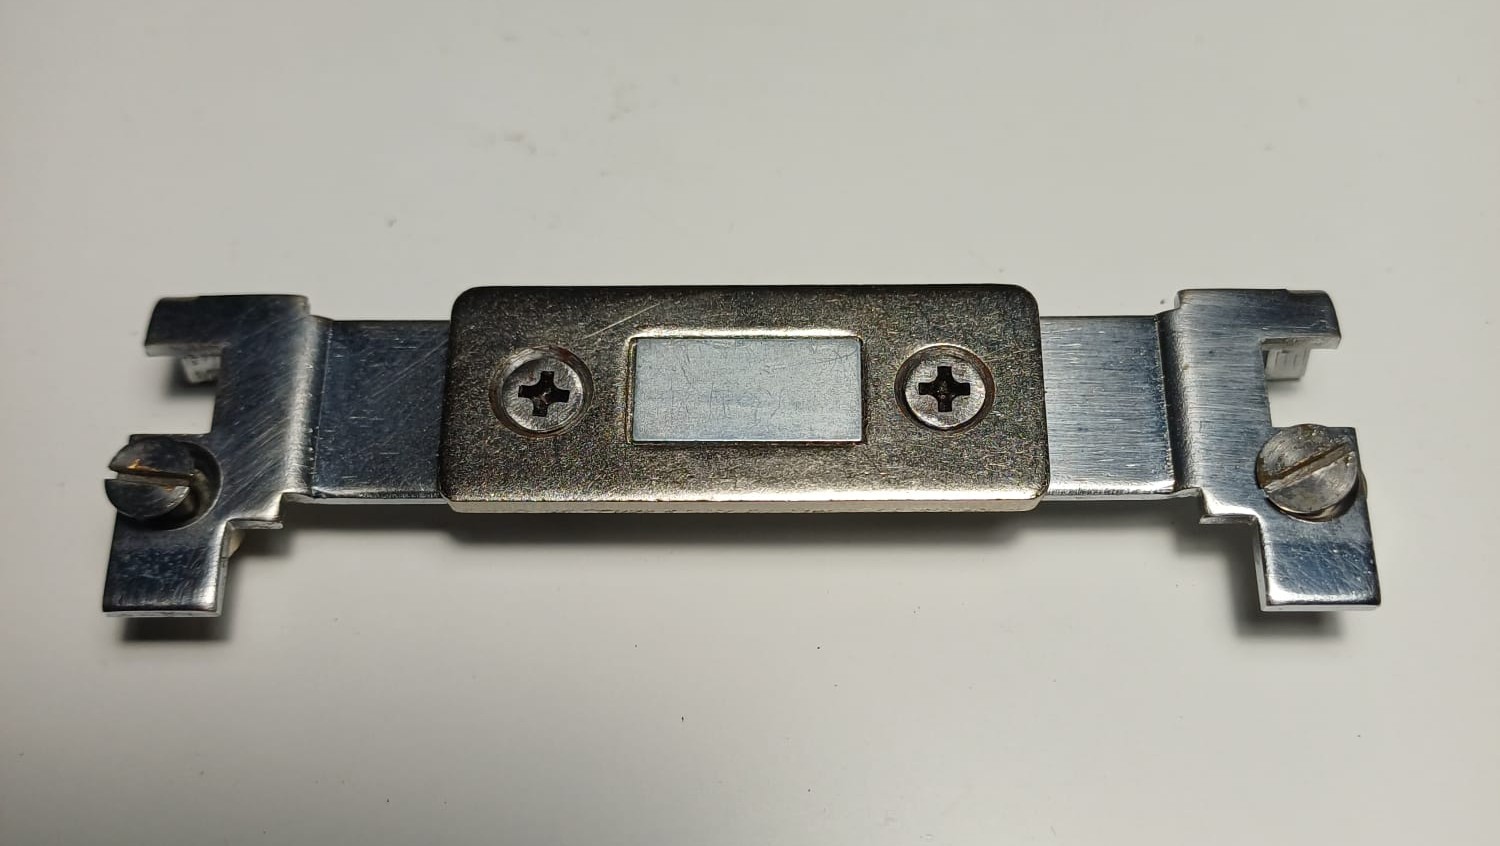
The Magnetic Cradle Mod: Instead of hiding a mechanical micro-switch inside the hook assembly, I custom-made a metal bracket equipped with a high-strength magnet. This heavy-duty magnet locks the receiver firmly in place when docked, keeping the open speakers locked in a forward-facing position so they blast stereo sound directly into the room.
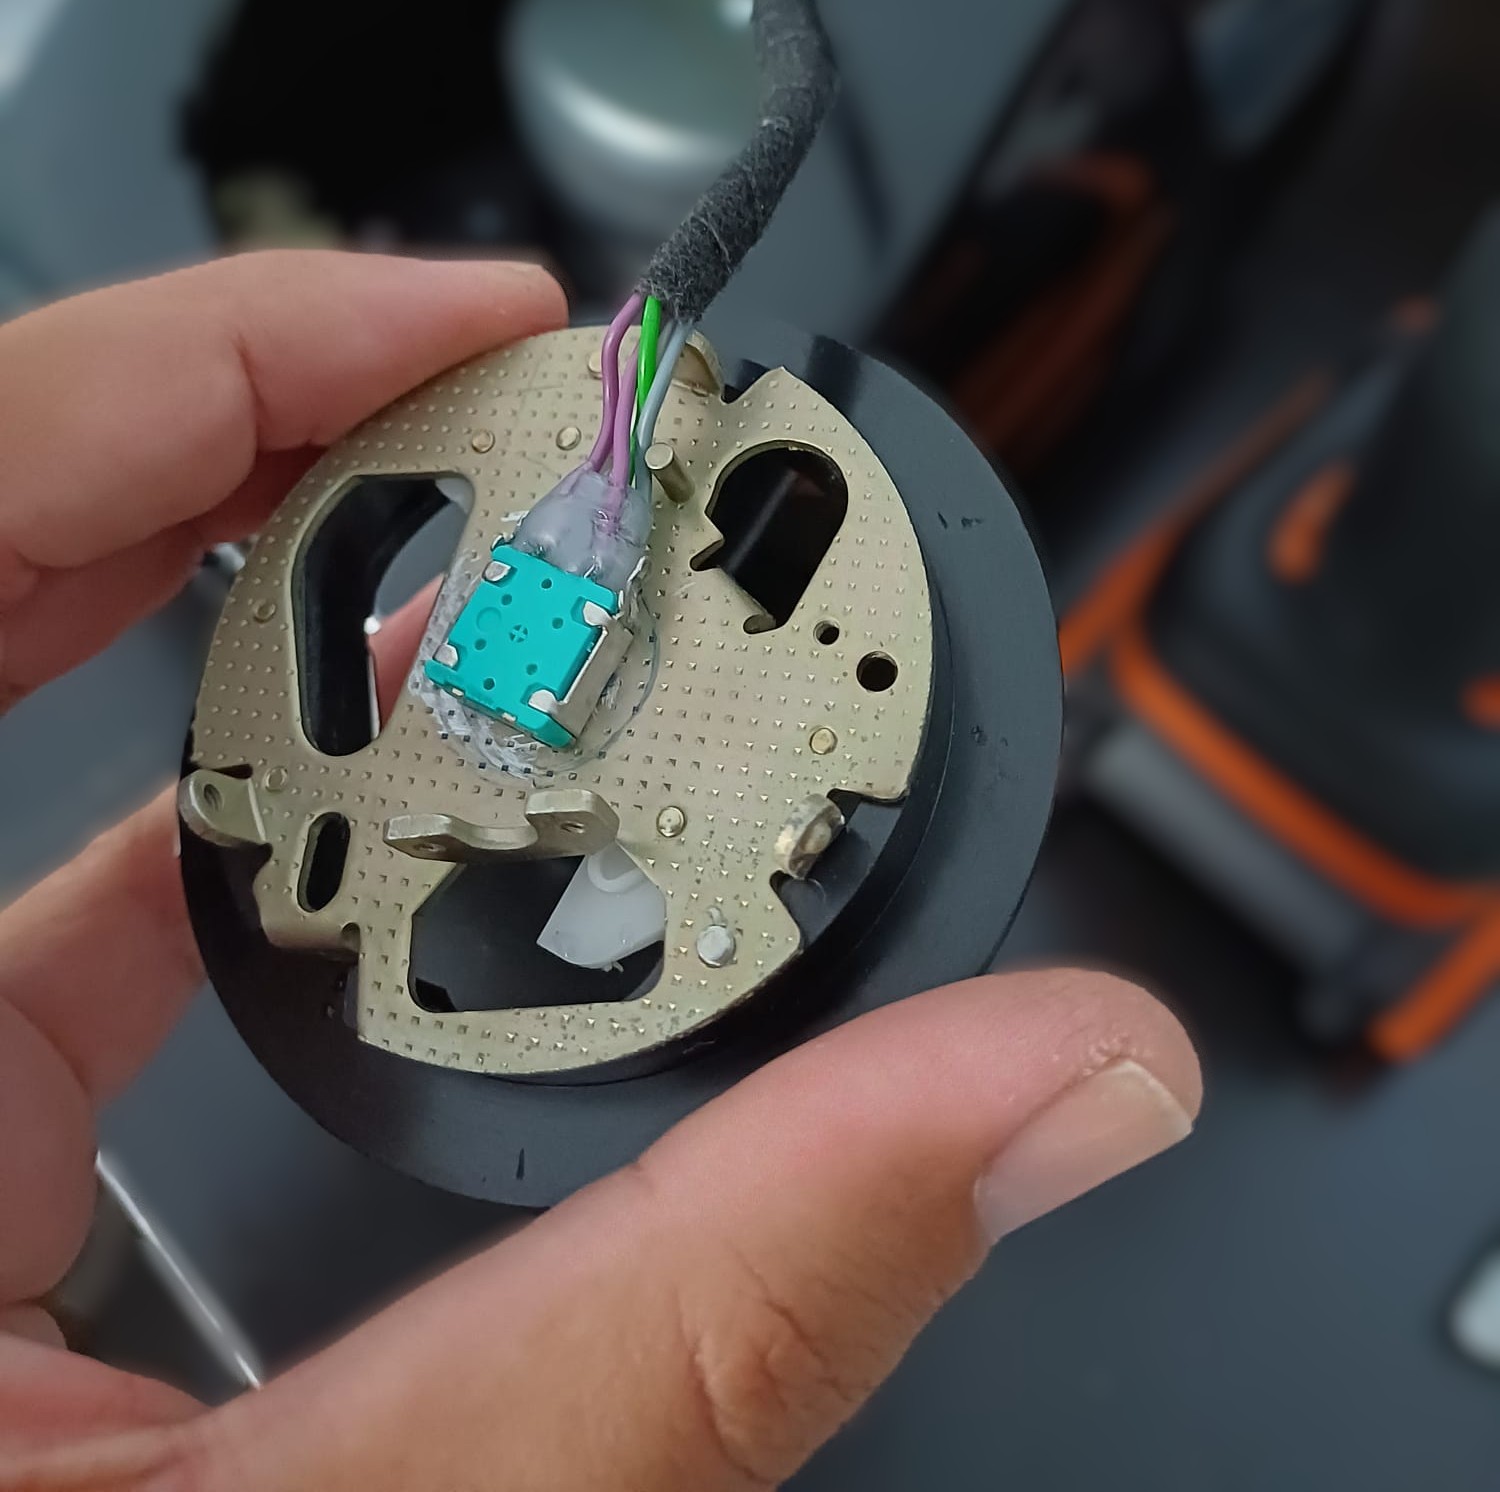
Rotary Dial Controls: I unsoldered the volume potentiometer from the amp board and fixed it directly into the mechanical dial gear assembly. When you turn the rotary wheel, it smoothly controls the master volume with an insanely satisfying tactile feel. Pressing in the rotary wheel for some seconds also turns the amp on and off.
Clean Wire Routing: All internal signal lines, power leads, LED and speaker runs are wrapped in heavy black braided sleeving and routed along the base plate, ensuring there's no rattling. Internal shell is also lined with adhesive foam to muffle the sound and decrease vibrations.
Phase 4: The Final Test Run
With everything mounted, glued, and soldered, I set the completed rotary Bluetooth monster down on the counter, grabbed a smartphone streaming Tool's "Parabola," and put the build to the absolute test.
Visual Status: Power up the unit, and a sharp green LED lights up right below the rotary housing, signaling that the Bluetooth receiver is live, connected, and ready to take your orders.
Sound Projection: Because the handset is held firmly facing forward by the magnetic dock, the dual full-range 15W drivers act like twin horn tweeters, throwing crisp highs and clear mids directly across the room.
Resonance and Punch: When the heavy bassline drops, the 30W downward-firing subwoofer turns the heavy vintage plastic body into a custom bass-reflex chamber. The entire desk shakes while the rotary wheel stays solid. I added rubber feet so it stays put.
Conclusion
Is this project completely unnecessary? Absolutely. Could you just buy a portable Bluetooth speaker at a big-box store for fifty bucks and save yourself ten hours of wire-stripping, soldering burns, and hot-glue fumes? Sure, if you want your house to look like a generic hotel room.
Building a custom rotary phone speaker gives you something money can't buy: a heavy, clunky, glorious Frankenstein monster of a sound system that makes people stop and say, "Wait, is that phone playing music?"
Comentários
Sem comentários. Seja o primeiro a comentar!
Deixe um comentário